Security
Different people that use the Church Windows software are kept track of as Users on the Security screen. The Security screen is a panel of options where you can designate only certain Users to have access to the different features of each Module of Church Windows.
Important!
When logging into Church Windows, you will need to know the Username, not the Full Name. The Full Name is only for reference in the security screen and is not used to log in, so make sure any new user that is set up knows their Username since it will need to be typed in. There is not a list of usernames to choose from.
From The Initial Portal of Church Windows choose Administration, then click Security:

Users
The Users list is set up to accommodate a set of permissions per User added to the list. Therefore, designating the Users of this software means that you must also designate the features that you want each User to use. Once there has been at least one Active user added to the list of Users, the software will open to a screen prompting you to enter a Username and enter a Password before The Initial Portal opens.
Note:
Only one person can be logged in as a certain user at any given time.
Click the + Add button to create a new user.
User Information
- The information for New User 1 will appear in the list and in the Full Name field on the System tab, on the right side of the screen.
- Replace New User 1 with the Full Name of the person you are letting have access to the software.
- Enter a desired Username (first names are a good choice).
- Enter a desired Password (the users can change this themselves later on, if needed).
- To help you verify that you have correctly entered the password you intended, click the
 eye button next to the field. The characters entered in the field will turn from asterisks to the text you actually typed.
 - Every user MUST have a password. Passwords are case sensitive, but Usernames are not.
- To help you verify that you have correctly entered the password you intended, click the
Note:
When setting up Users, make sure that you allow access to the Security screens for at least one user. Doing so will give one user the ability to make changes to User information and make any changes to software feature access privileges as needed.
Allow user...
- Access Security Screens
Click to place a checkmark in the box if you want to allow the User to open this Security screen and make changes to the Security and Passwords information on this screen.
 - Restore Backups
Place a checkmark in the box if you want to allow the User access to the Restore Data feature found under the Administration menu. We recommend exercising caution with this permission and limiting this access to only one or two users as Restoring a Backup will completely erase any data entered into the system after Making a Backup.
System Information
This is the screen where you can make changes to the
Organization Info
(Church name and location) and the software license activation. To give the User access to the System Information feature found under the Administration menu, click the option to give the User one of the following levels of access:
- None
The User will be able to click the Administration menu to view the menu options, but will not be able to click the System Information screen. The option will be grayed out. - Read-only
The User will be able to click the System Information option under Administration and view the screen settings, but will not be able to change anything that has been entered in any of the fields. - Full
The User will be able to view and/or change settings on the System Information screen without restriction.
As long as you allow at least one User the access to the Security screens, you can go back to make changes to any other settings you make on the Security screen. To maintain an accurate Audit History, it is not possible to delete old Users, instead you can make them Inactive if no longer needed.
To remove a log in, select the user from the list on the left and click on the Make Inactive button. This will deactivate their log in so that it can no longer be used to log in to Church Windows. Their name will appear in red and the next time you go to the Security screen, they'll move to the bottom of the list of users.
Module Permissions tabs
After adding a new User, the tabs for each specific Module contain lists of features in that Module where you can give the User a specific level of access to each listed feature. You can prohibit a User from accessing entire Modules by unchecking the box at the top of the tab: Allow User Access to Membership / Scheduler / Donations / Accounting Module. At the bottom of each tab are the more global, broad settings for that Module.
Click the  expand button to the left of each row to view details (when expanded it will become a
  collapse button).
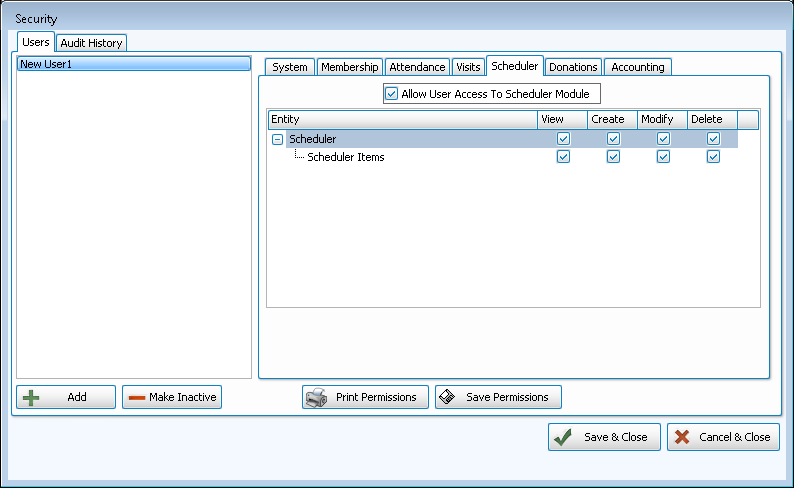
The specific features are separated into categories on each tab. Next to each desired feature, click the box to place or remove a checkmark under each of the following applicable columns:
- View
When checked, the User will be allowed to open and view the screen items. - Create
When checked, the User will be allowed to add new information. - Modify
When checked, the User will be allowed to make changes to information already entered. - Delete
When checked, the User will be allowed to remove information.
Continue through all settings on each of the module tabs until you have completed setting up your list of Users. You can click the button to Save Permissions after you make adjustments to this screen. Click Print Permissions to print them out. Then click Save & Close to retain your changes and exit the Security screen.
The options on this tab control the selected User's access to the Membership Module features of the software including The People File, Reports / Directory / Exports, Groups/Classes and Skills/Interests, and more:
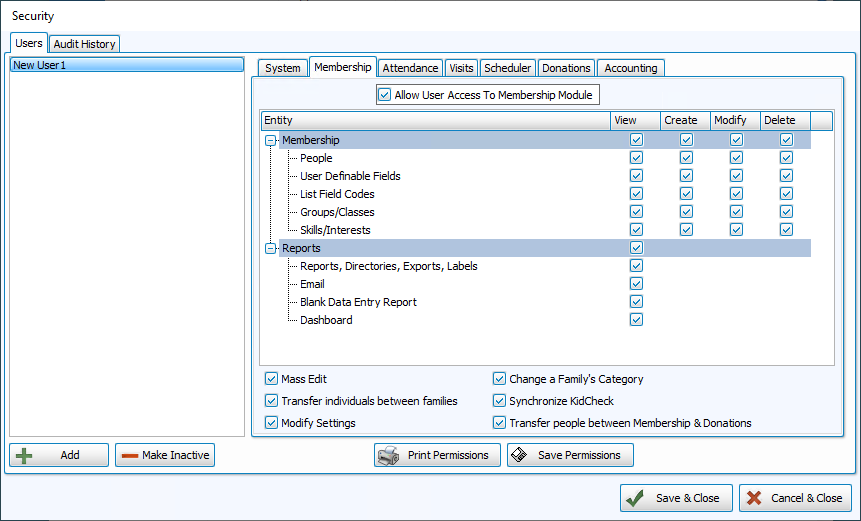
Note:
Prohibiting a User from accessing Membership also prohibits them from accessing Attendance and Visits.
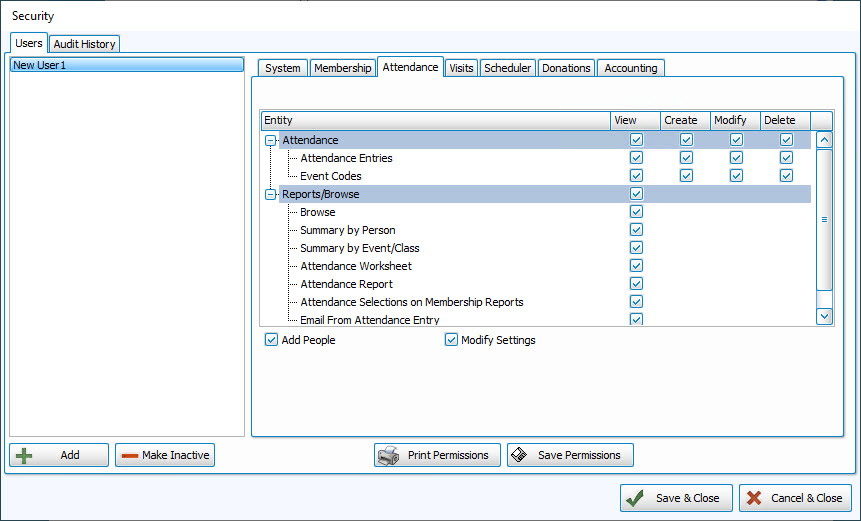
The options on these tab control the selected User's access to the Attendance Options of the Membership Module of the software:
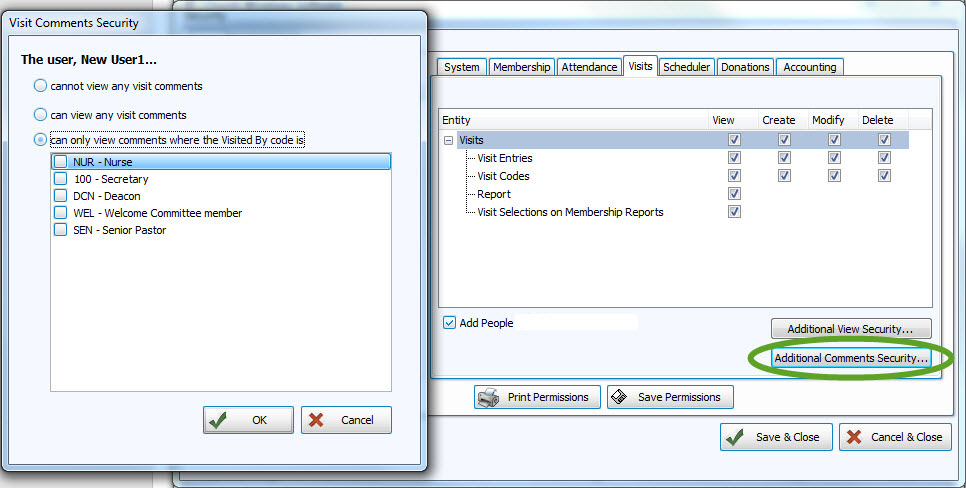
The options on these tab control the selected User's access to the Visits features of the Membership Module of the software. In addition to the checkbox options, there are two buttons with additional Visits view and comment options:
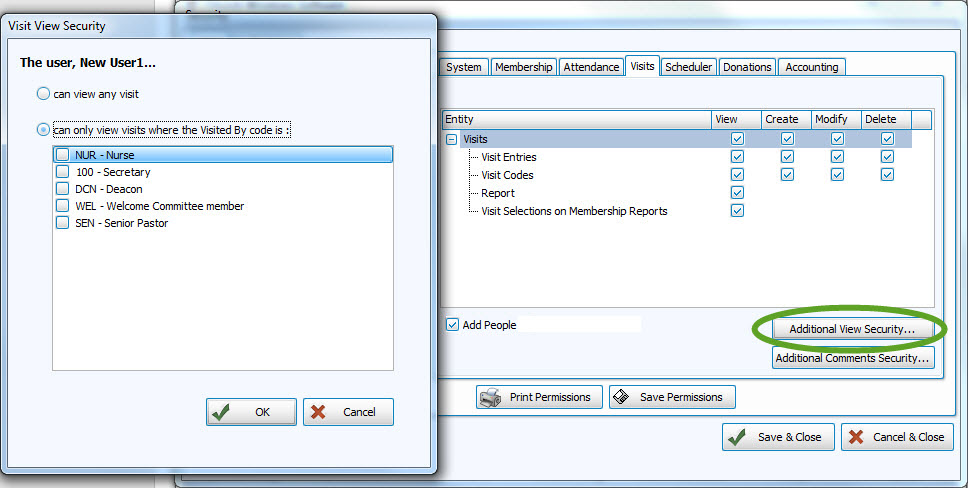
AND
The options on the Scheduler tab control the selected User's access to the Scheduler Options of Church Windows.
For the selected User to be able to enter, browse, and/or edit in the Donations Module, make sure that you place a checkmark in the Allow User Access to Donations Module. Or, remove the checkmark to prohibit the user from having any access.
Donations permissions are broken up into four categories:
Accounts & Pledges, Givers, Giving, and Reports / Browse.
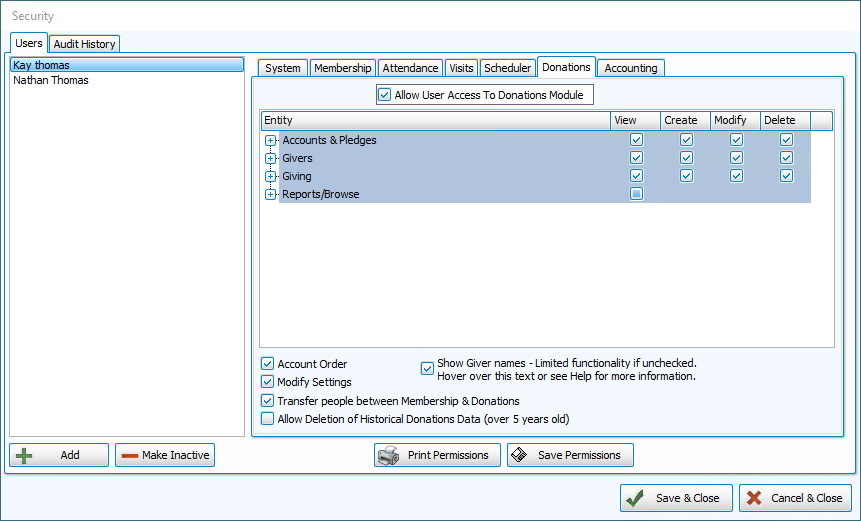
Note:
When 'Show Giver names — Limited functionality' is unchecked, the options you select in the list will change to allow the User to use Donations without seeing names. Givers without a Giver # will not be displayed. Also keep in mind that when showing Giver names is not allowed, many parts of Donations are not accessible.
Accounting permissions are broken up into Accounts, Transactions, Reports, and Export.
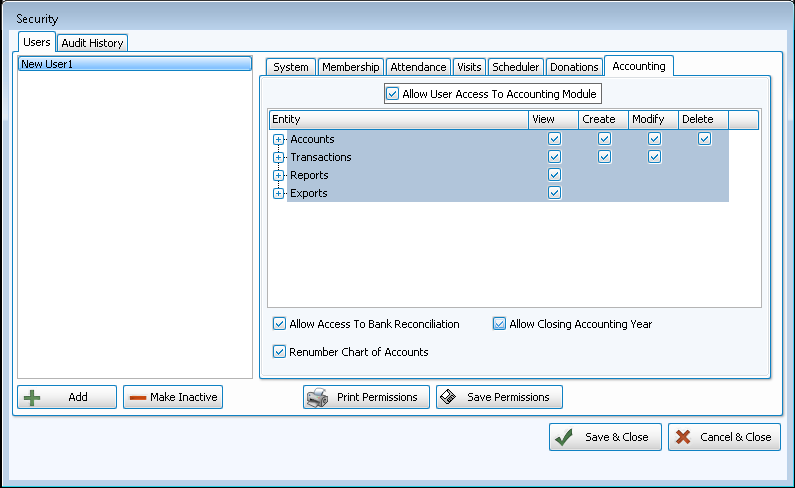
If you wish to give the User access to the Renumber Chart of Accounts, Allow Access to Bank Reconciliation, and/or Allow Closing Accounting Year place a checkmark in the corresponding box.
Audit History
Keep track of data that has been backed up and restored onto your installation of Church Windows by reviewing the list found on this tab:

Date Occurred
Shows the time and date that the action took place.
Action
Indicates if the user was Making a Backup or Restoring a Backup.
CHP Module
Shows the Module(s) affected by the item in the list.
Reason
Contains the reason that was entered by the user who made or restored a backup.
User Full Name
By having setup Users, this screen will also show you which user restored the data.
Computer Name
Shows the name of the computer (set up on the Computer itself).
Other columns include Additional Information, Old Data, New Data, CHP Technician, and CHP Version.
If you wish to document your history of Making a Backup and Restoring a Backup, you can click the button to Export Audit History. A message will show you that the file was saved to a specific location and ask you if you would like to open the folder. The file is saved as a PDF file. If you choose to open the folder you can then move the file to any other location you wish.
