Scheduler Options
You can modify certain settings for the Scheduler Main Screen. There are three tabs on this screen:
General Tab, Refresh Data Tab, and Tool Tip Tab.
- From The Initial Portal of Church Windows choose Scheduler
- Click Setup at the top of the screen
- Choose Options from the dropdown list
- The Options
screen will appear:
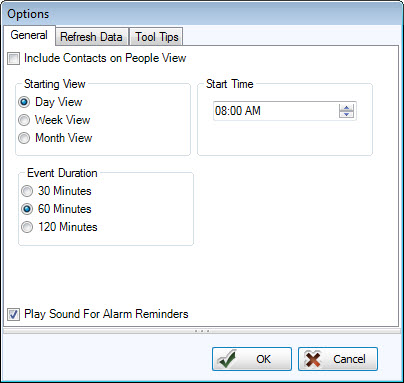
 General Tab
- Include Contacts
on People View
Click to put a checkmark in the box if you want the events for which the individual
is listed as a contact to appear in that individual’s column when the
Scheduler Main Screen view is set to View by Person. If this box is left blank, the event will only appear on the grid
in the View by Person display in the column(s) for the individuals
who have been assigned duties for that event.
checkmark in the box if you want the events for which the individual
is listed as a contact to appear in that individual’s column when the
Scheduler Main Screen view is set to View by Person. If this box is left blank, the event will only appear on the grid
in the View by Person display in the column(s) for the individuals
who have been assigned duties for that event. - Starting View
This section allows you to choose whether you want the grid in the Day, Week, or Month view when you initially open the main Scheduler grid. Click the radio button beside the view you prefer. The change will take effect the
next time you open the Scheduler Module.
radio button beside the view you prefer. The change will take effect the
next time you open the Scheduler Module.
Note:
To schedule or view an event that starts before the grid start time, use the up arrow on the scroll bar on the right side of the grid to move the grid up. - Start Time
This allows you to select a time that the grid day should start. Type in the desired time or use the up and down arrows to change the hour. The grid will start with the hour that includes the time entered. - Event Duration
The default is 60 minutes. When you schedule an event and enter a Start Time, the program will calculate the End Time as 60 minutes later. You can leave the default time or enter a new End Time. If you prefer, you can change the default Event Duration to either 30 Minutes or 120 Minutes by clicking on the radio button beside
the desired duration. - Play Sounds For Alarm Reminders
By checking the box, you allow Scheduler to play a sound to alert you of your reminders.Note:
Reminder alarms can only display at the desired time if the Scheduler Module is running when the reminder time occurs.
Refresh Data Tab
This tab is important only in a networked environment (see Network Installation if needed).

It indicates how often your view of the schedule is updated with data others have entered from other computers on the network. If you have several people making entries to the schedule at the same time from different computers, then you may want to reduce the time between refreshes.
The Default Refresh Rate is 5 minutes. Click this tab to edit the default screen refresh
rate. Click
the radio button for either 2 Minutes or 10 Minutes if you wish to change
the frequency.
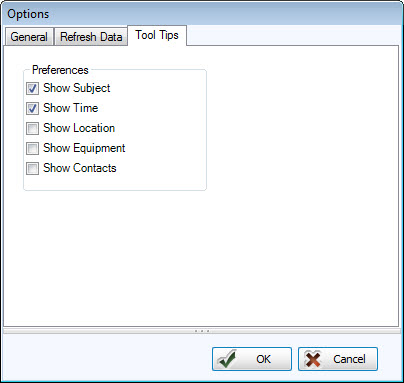
Tool Tip Tab
Click this tab to choose what information is displayed in the bubble that appears when your mouse hovers over a scheduled event:
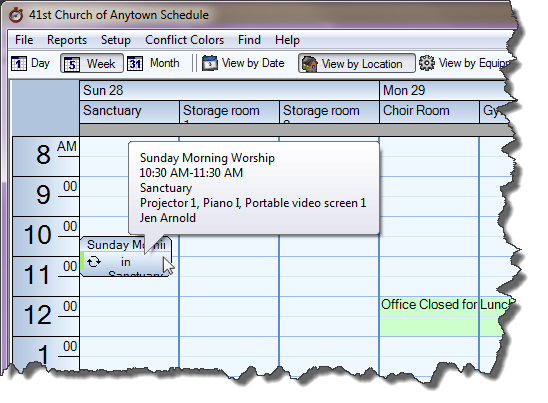
If
you remove all checkmarks then Tool Tips will not appear on the schedule at all.