Reports / Directory / Exports
When clicking on the Reports button from the Membership Portal, the Membership Reports window will open. You will use this process for creating almost all of your Membership Reports, including Directories, Mail Merges, and lists of specific combinations of people in your database.
There are two steps in the process of creating reports:
- Step 1 is where you select WHO appears on the report.
- Step 2 is where you select WHAT information appears on the report.
Note:
If your are creating a Directory report or you want to include everyone, you do NOT need to enter any selection criteria on Step 1. Directories are automatically based off of the "Include on Directory" and "Directory/Report Order" fields on The Individual Record. All you need do in Step 1 is be sure the Sort tab has the desired selections, then click → Next.
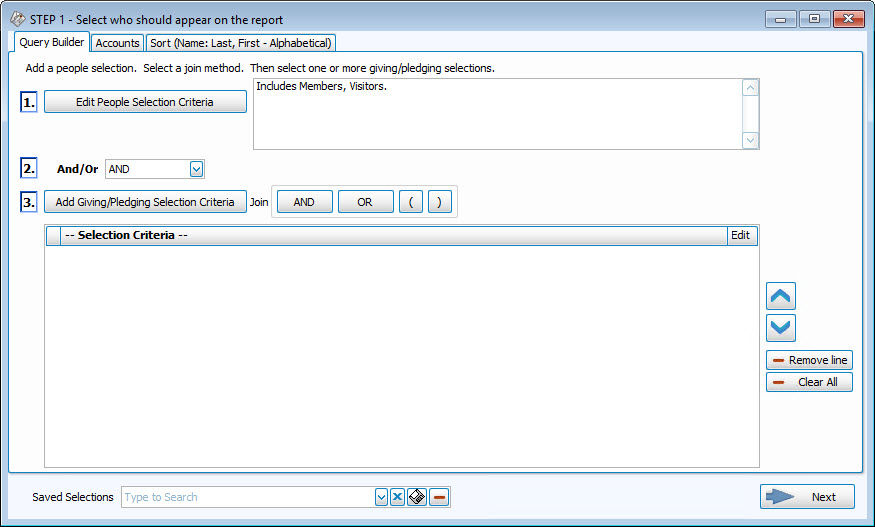
Step 1 — Select who should appear on the report
Here you will build a search query to limit your report to include only specific people in a specific order by making selections for People, Giving / Pledging, Accounts, and/or Sort:
You can now combine several different combinations of Giving / Pledging criteria, including comparing different date ranges by joining them with ANDs, ORs, and parentheses. Click the  pencil buttons to edit search criteria after adding, if needed.
Query Builder tab
-
 People Selection Criteria
Start by selecting information from The People File to limit the people included on your report:
Select a Membership Field
Choose any field in The Individual Record or The Family Record to compile a search query limiting the people who will be included on the report. To include everyone, do not make any selections.
The different Field Types will provide different "operator" choices, such as:

OR

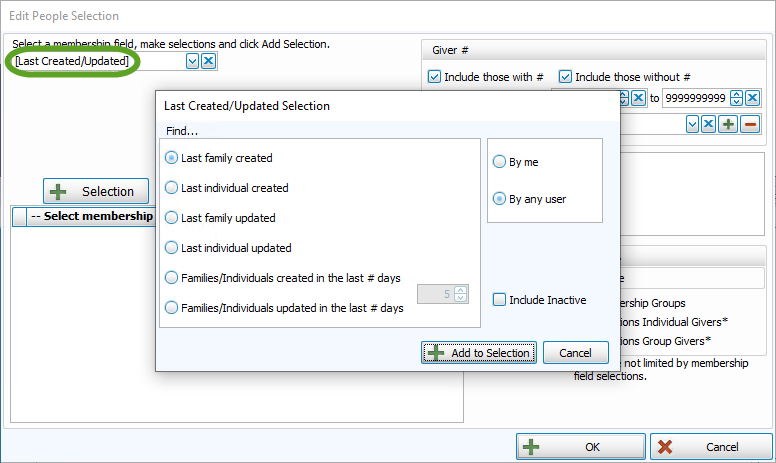
The selections at the top of the list in [brackets] will open a separate window for your to enter your criteria, then press the
 'Add to Selection' button to return to the People Selection Criteria screen. These selections include: In the Select a Membership field box, choose [Attendance]. , A separate window will open where you can select your desired [Groups / Classes]: Note:In either method, you may limit the Groups/Classes selection to any combination of Past, Present, or Future members by checking or unchecking the respective boxes., Or [Skills / Interests]:, In the Select a Membership field box, choose [Visits]. , or [Last Created/Updated]:
Once you make a Membership Field Selection, to add it to the search criteria click on the
 'Add Selection' button. It will add it to the -- Select membership Individuals fitting these criteria -- box below.
 For example, if you want to add ages greater than 65 to the criteria, just use the Membership Field dropdown to select Age like above, then select the "greater than" operator, and put 65 in the first box. Then click on the
button. It will add it and look like this:
Once you have at least one criteria added to your selection, you can either continue selecting other options for the report with just one criteria, or use the Membership Field dropdown again to select additional options.
Before you can click on the
 button to add additional criteria, you must either click the AND or the OR button to the right of the button to specify how you want the selections applied:
- AND — Use to search for people who meet BOTH of the criteria, allowing less people to be included.
- OR — Use to search for people who meet EITHER of the criteria, allowing more people to be included.
- For more complex searches, you can also add parentheses to select people meeting either or both of several different combinations of criteria selections.
Then you will be able to click on the
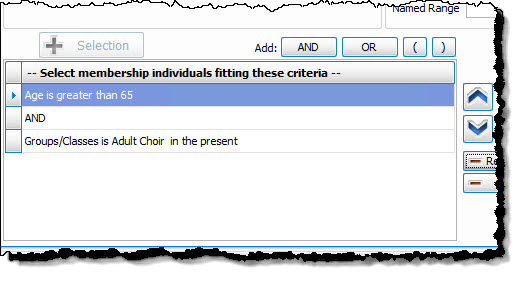
button. So for this example,
- Select age greater than 65
- Then click the button
- Then select Groups / Classes and choose those presently in the adult choir
- Then click "AND"
- Then click the button again, and it will look like this:
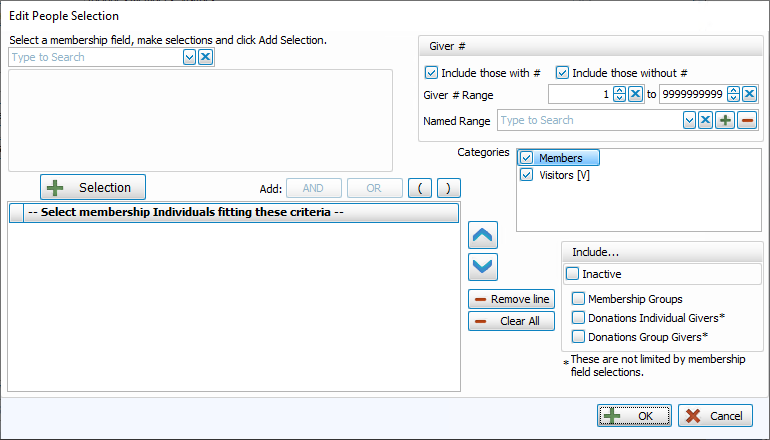
- If you would like to include all Givers, regardless of whether the Giver has a giving number stored on record, make sure that a
 check mark is placed in both Select Givers with # and Select Givers without # boxes. Otherwise, place a check mark in only one of the two boxes. (If needed, see Assign Giver Numbers)
 - Use the Giver # Range boxes to choose the range of Giver numbers for the labels or statements you want to print.
- If you have saved a Giver # Range in the past and would like to reuse it, select it from the Named Range box.
- You can also add a new Named Range by clicking the
 Add button. Or, if you no longer need a Named Range that currently exists in the list, select it and click the
  button.
Categories
If you wish to exclude Visitors (or people in other Family Categories you may have added), click the
 checkbox to uncheck the Categories you do not want to see on the report.
 Include...
- If you wish to include Inactive givers in the report, click the box to place a checkmark. With a checkmark in the box, the report will show both of the following:
- Givers that have been marked as Inactive on the Manage Givers screen of the Donations Module.
- Givers that have been marked Inactive with an Inactive Reason (formerly Reason for Termination) on
The Individual Record in the
Membership Module.
- Place a checkmark in the boxes if you also wish to include:
- Membership Groups / Classes,
- Donations Individual Givers*
- Donations Group Givers*
(The asterisk * next to Donations Individual and Group Givers indicates that the Membership criteria selections will not be applied to them and they will be included on the report regardless.)
Once you have entered all options necessary for the people you would like to see, you can continue on to the next tab, Giving / Pledging.
-
And/Or
- AND — Use to search for people who meet BOTH of the criteria, allowing less people to be included.
- OR — Use to search for people who meet EITHER of the criteria, allowing more people to be included.
-
Giving / Pledging Selection Criteria
This screen allows you to select options to include people who either did or did not give or pledge, within certain date ranges. There are also options to select to show different combinations of types of Pledges:
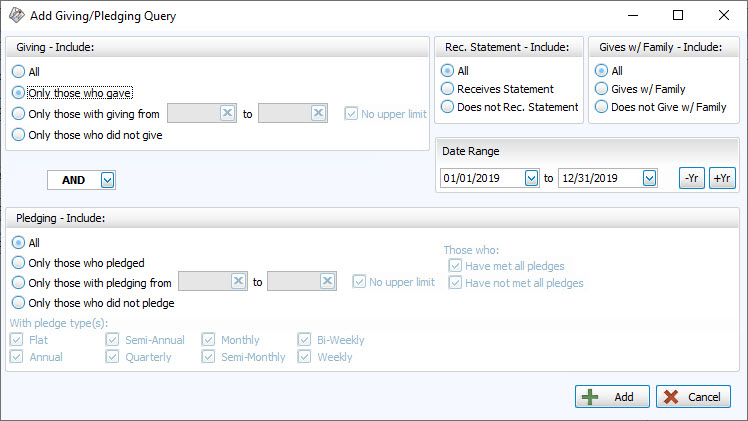
Make your desired selections for Giving at the top. Then select either AND or OR in the middle:
- AND — Use to search for people who meet BOTH of the criteria, allowing less people to be included.
- OR — Use to search for people who meet EITHER of the criteria, allowing more people to be included.
Then make your desired selections for Pledging at the bottom.
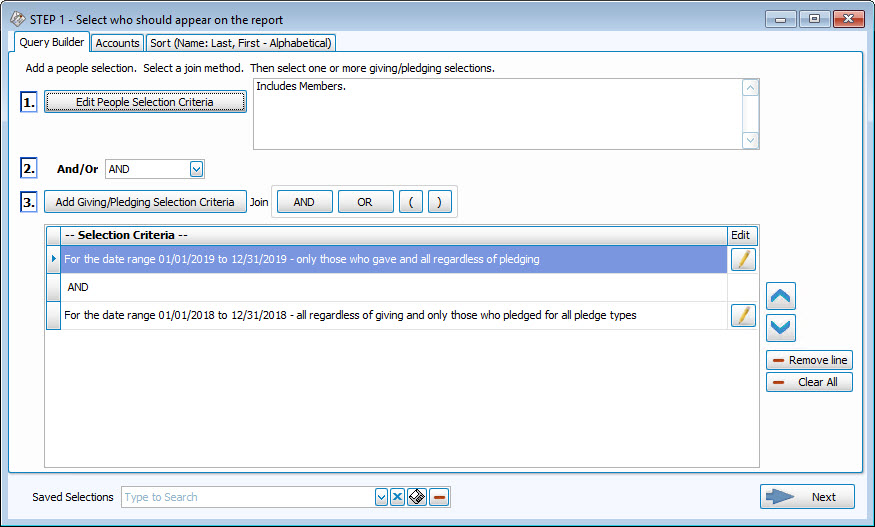
For example, If you want all Members who have given so far this year (regardless of pledging this year), who also pledged last year (regardless of giving last year), that search criteria would look like this:
Accounts Tab
This tab lets you decide which Donations accounts you do or do not want to show on your report. You can use the Campaign dropdown at the top to print only particular Campaign Pledges. As in other reports in Church Windows, you can use the  left and
  right arrow buttons in the middle, or just double click on the actual accounts to bring them back and forth between the Available account side and the Selected account side. You could also click on the Select All or Clear All buttons to move the entire list of accounts back and forth.
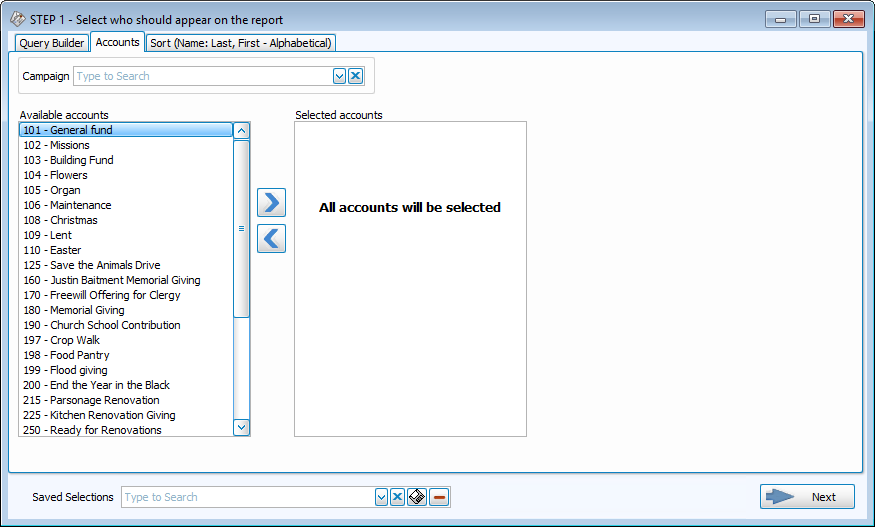
Once the account list is correct for what you would like to see, you can continue to the last tab, the Sort tab.
Sort Tab
Use this tab to sort the report contents into a particular order, organized by up to three columns / sort fields. This tab does not have any effect on the search criteria you have selected in Step 1 — Select who should appear on the report or on the fields of information that will appear on the final report which are selected in Step 2 — Select the report layout/format. It only gives you options to sort the people in a different order (for example, in alphabetical order by Name, numerical order by Age, or Zip Code, etc.). The Reset Sort button will clear out your selections and return all sort fields to the default.
Note:
There are three ways to sort by Name, depending on if you have family members with different last names:
- Last name, First name (strict alphabetical) - families with different last names would be separated and listed in true alphabetical order based on each individuals last, then first name
- Last name, Family*, First name (family's individuals with same last name will be grouped together) - individuals will be sorted by their own last name, then by their family's name, then by their own first name
- Family name*, Last name, First name (all family's individuals will be grouped together) - individuals will be listed in order by their family's last name, then by their own last name, then by their own first name
*The Family name is determined from the Last name of the person in the family who is assigned the Directory/Report Order of 1 — Primary.
- Sort Fields 1-3
Choose the name of the Membership field(s) by which to organize the contents of the report:- Sort Field 1
The field chosen will sort the entire list by this field first. - Sort Field 2
Choose a field if you want further sort the list within the order chosen in Sort Field 1. - Sort Field 3
To sort the list in an additional order within the order chosen in Sort Field 2, choose a field here as well.
For example, you could choose Zip Code for Sort Field 1, then within each Zip Code you could make Sort Field 2 Status Code, then within each Status Code grouping you could sort by Name for Sort Field 3.
- Sort Field 1
- Ascending & Descending:
Choose the order in which you want the contents to be sorted:- Ascending — lowest to highest / alphabetical
- Descending — highest to lowest / reverse alphabetical
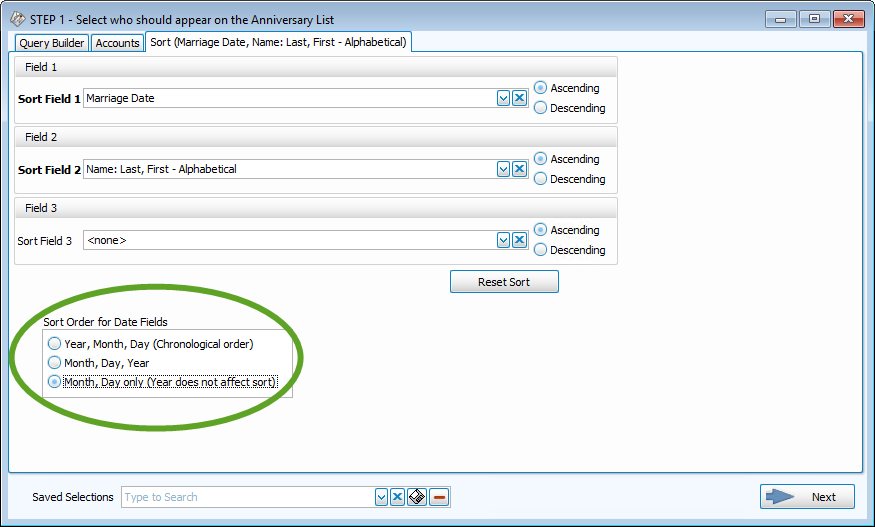
- Sort Order for Date Fields:
For date driven sort orders on reports (such as Membership date or Birthday and Anniversary Reports) pay special attention to this box, found in the bottom left, and make the desired selection (not applicable in emails).
Note:
Once you have selected the appropriate criteria in any tab(s), you have the ability to save the all selections you have made in all the tabs by clicking on the  floppy-disc button to the right of the Saved Selections field at the bottom, at any time, no matter which tab you are in, and name it appropriately. From that point on, you can access that specific search criteria any time you go back into this screen.
When you have made all your query selections on all of the necessary tabs in Step 1, you can click the → Next button at the bottom to get to the Step 2 — Select the report layout/format screen.
Step 2 — Select the report layout/format
Here you will have a new set of tabs and options to determine how your report will look:
Options tab
First, select the desired report format in the upper left. There are six choices for types of reports:
- Basic
- All Information
- Directory
- Custom
- Mail Merge / Export
- Directory Export
Note:
Pay special attention to the blue text at the bottom of the Options area below the dropdown menu, which will change depending upon the type of report you have selected to inform you of any specific requirements for that type of report. For example, a Directory report requires the "Include on Directory" and "Directory/Report Order" fields on The Individual Record to be filled out correctly.
Report Templates
Selecting any one of these six report options will offer different template choices in the dropdown list below. There are many different layouts and options for each type of report. The default layouts that come with Church Windows will all say [Template] and then the name of the layout. These templates cannot be modified or replaced, however they can be used as a starting point as long as you enter a new name when you save the layout. Any layout that you modify or create cannot have [Template] before the name of the layout.
Regardless of which report you choose, you can either select an existing template from the  dropdown list or click New to create your own report:
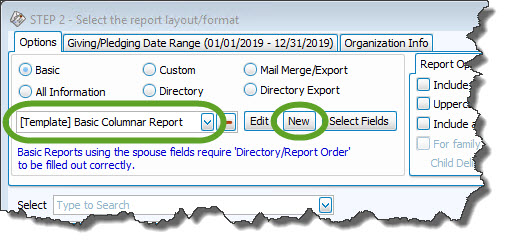
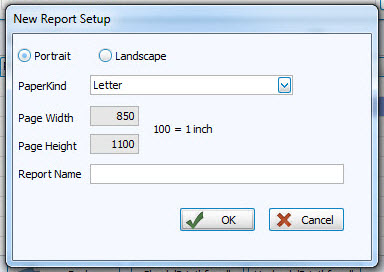
To create your own template for any type of report, start by clicking the New button. The New Report Setup screen gives options for adjusting page setup information and entering a Report Name, then click OK:
Note:
When naming a new report layout, keep in mind that you are creating a template which can be used for other reports with different data in the future, therefore names should NOT include specific dates or the search criteria you used to compile the report. Instead, the name should indicate what kind of information will be included in the report.
Basic, All Information, Mail Merge / Export, and Directory Export
Each of these report types are modified and created in the same way.
- The default template for Basic reports is called the "[Template] Basic Columnar Report" and will usually include Name, Address, and Phone number.
- For Birthday and Anniversary Reports, this template will include the dates and specific relevant fields on Groups / Classes and Skills / Interests Reports.
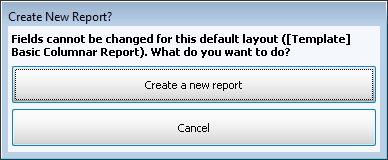
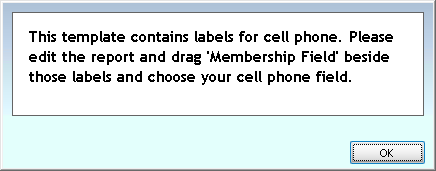
- You cannot save over or delete the default [Templates] that come with Church Windows, you will need to create your own template if you wish to include other fields. If you attempt to modify a default layout you will get a popup message like this:
- Directory Exports are used when you are using a company such as to Lifetouch Church Directories to produce a directory for your Church and you need to send them a TXT or CSV file containing your Membership data.
- You can delete any templates that you have made but no longer need by selecting it from the
- Use the Select Fields button to open the Column Selector to determine what information will be included on your report / export:
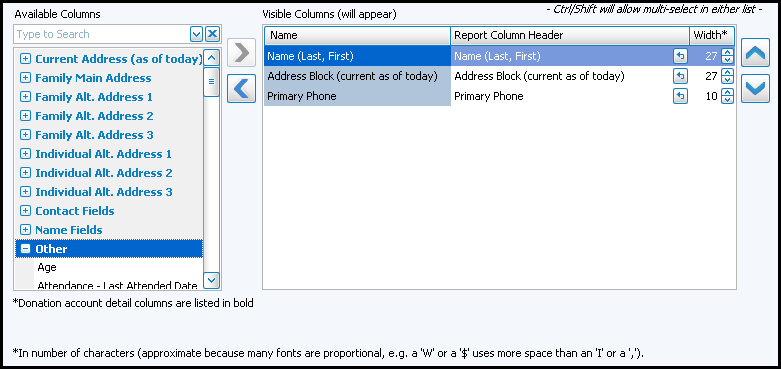
The Column Selector or Columns Tab allows you to decide which fields from The Individual Record or The Family Record will be visible on the report and which will not be visible.
On the left hand side Available Columns are the columns that are not showing but are available to be shown if desired. On the right side Visible Columns are the columns that are currently selected to be shown:
- If needed, to browse the Available Columns, click the
to expand a group of fields or use the "Type to Search" dropdown
- You can either highlight the column and use the
- Use the
up and down arrow buttons to rearrange the order of the columns.
- Underneath the Visible Columns on the right is a space for the "Report Column Header". You can edit this text to label that field differently on your printed / exported report without changing the actual column name in the database.
For example, you could remove "(current as of today)" from the Address field's Report Column Header, as it would likely be unnecessary to include on the report.- Each column is set to print at a certain column width automatically. You can also change the width of the columns that show on the report. Raise or lower the number in the Width* column according to your preference.
- Click OK when you are satisfied with your column selections.
- You can click on the 'Select Fields' button to the right of the report name dropdown list to reopen the Column Selector and make additional changes later.
When you choose to create a Mail Merge / Export or Directory Export, you will use the Column Selector to choose the fields that will appear on the export, either by clicking New to create a new export template or by choosing a template from the
Then you must choose where the exported file will be saved and what type of file it will be saved as:
- File: Choose a location on your computer where you want to save the file (such as you Desktop or My Documents folder) by clicking the
ellipses button to the right of the box. You can change the name of the exported file when you are choosing the location to save.
- Delimiter: Select either Tab to create a .TXT file or Comma to create a .CSV file.
- If applicable, you can choose to "Include the year on Birth date" for everyone, no one, or "Only for children".
Directory and Custom
- For Directory / Custom Reports, the template choices will be the same for both:
- If you have selected a template that requires any further editing to be completed, a message will popup:
- The Basic report options above usually allow sufficient customization using the Column Selector for most reports; so before using Directory / Custom Reports, make sure there is not already a default template or Basic report that will suit your needs.
- Formatting is done using the Report Designer, accessed by clicking the Edit button (the Column Selector is not used for these reports).
- This detailed tool lets you change the intricate aspects of each field on your report: fonts, sizes, position, separators, headers and footers, etc. This is a very involved tool and usually only used by those very familiar with customization and designing that have specific requirements.

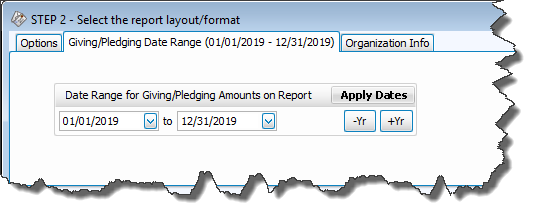
Giving / Pledging Date Range tab
This tab allows you to select a different date range to print on the report than the selections you made in Step 1 — Select who should appear on the report for the Giving / Pledging Selection Criteria
Organization Info tab
Unless otherwise specified, your Church name will appear at the top of the report as you initially entered it into the Organization Info stored in System Information in the Administration area of Church Windows.
If you need to create additional sets of Organization Information, click the Add button. Or, select an existing name from the Org. Info box and click either  Edit to change it or Delete to remove it from the list.
Report Options tab
To the right of the Options/
Organization Info
tabs are two or three other tabs with various additional report options depending on which type of report you have selected. These tabs let you further customize what and how you want other items to show on your output:

Grouping / Page Break Options tab
In order to have the system print the reports on separate pages, you have a few options.
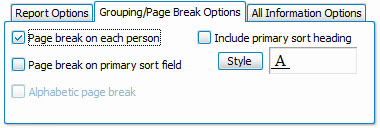
If you want to give each person their own separate report, place a checkmark in the Page break on each person box. If you check the box to Page break on primary sort field, you can have the report split onto separate pages based on the selection you made on the Sort Tab (such as Status Code or School Grade). If you want your directory to have page breaks between each letter of the alphabet you can choose Alphabetic page break and/or you can check the box to Include primary/alphabetic sort heading and the report will insert headings before each group of records.
Unlisted Options tab
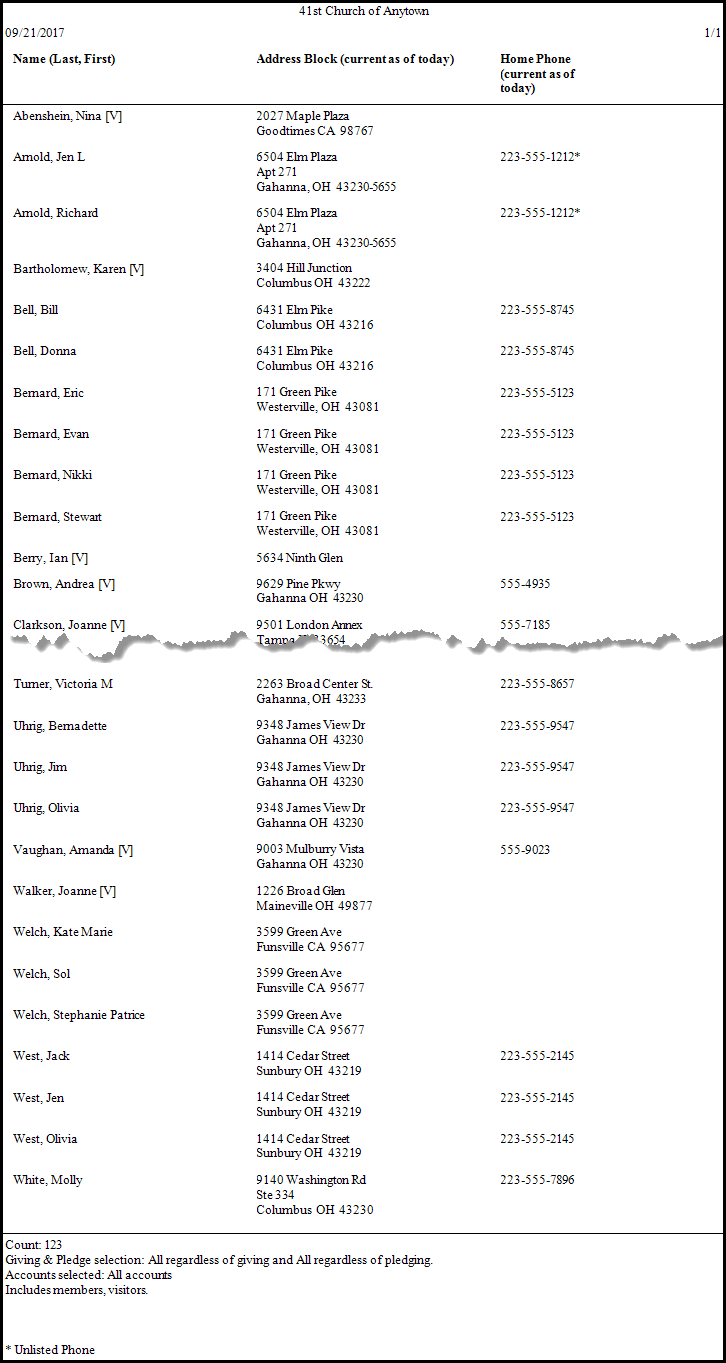
When Phone, Email, or Addresses are marked as Unlisted you can use this tab to determine whether or not they will print on reports and, if so, to include and asterisk * if they are Unlisted:
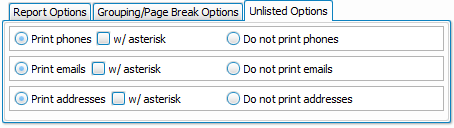
On most reports, they are included by default, however on Directories the default is Do not print.
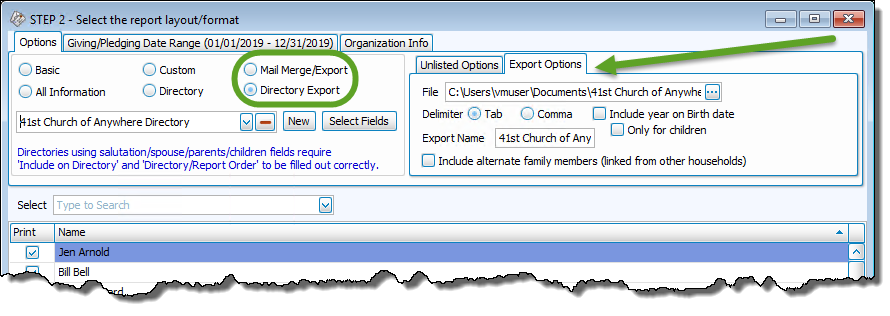
Export Options tab
When doing an Export (Mail Merge or Directory Export) the path beside the word File determines where the export will be saved. If the specified path is not where you want it, you'll need to click the  ellipsis button and browse to the desired location.
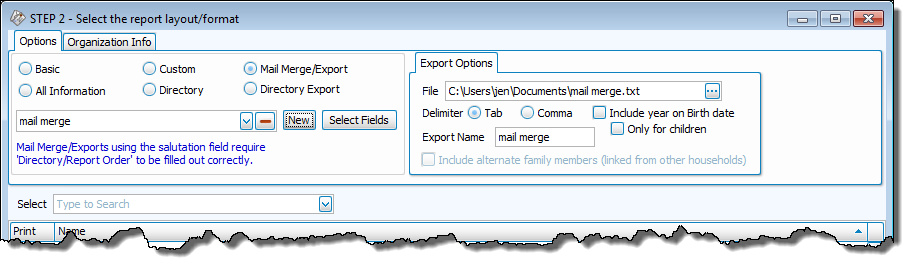
Delimiter
- Tab - creates a TXT file with fields separated by tabs
- Comma - creates a CSV file with fields separated by commas
Select People
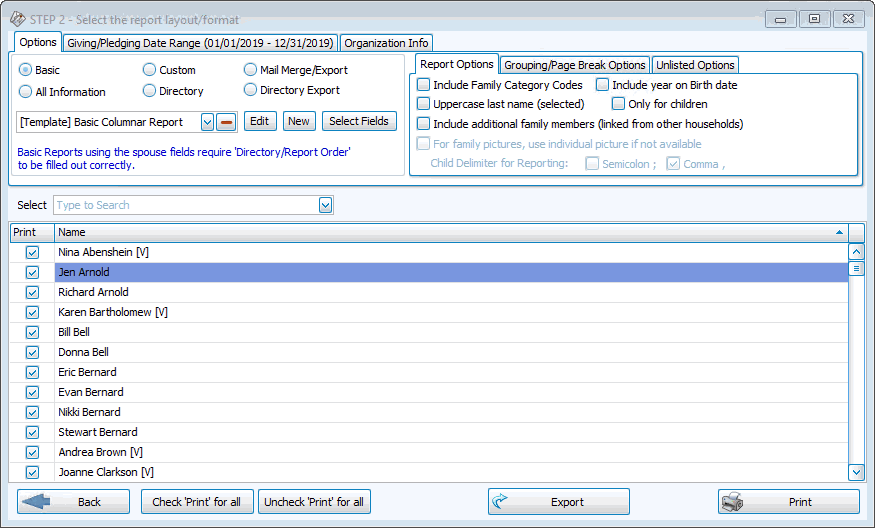
The bottom half of this window allows you to do a final select and/or deselect of people and/or groups on the reports:
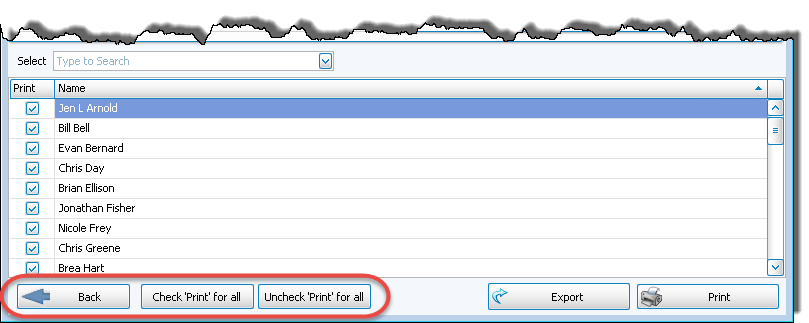
The list contains every person, group, class, etc. that meets the criteria of your report parameters. They will all default to having a check in the Print column so that they will appear on the report. However, if you want to deselect anyone or anything, you can take the check out of the box to exclude them from your report. There are buttons at the bottom to "Check 'Print' for all" or "Uncheck 'Print' for all" with a single click, along with a ← Back button if you need to return to make changes to the report criteria in Step 1 — Select who should appear on the report.
Once you have made all of your selections, click Print to view a Print Preview and then proceed in sending the file to your printer. You can also Export most reports and/or Send via Email as a file to be used outside of Church Windows.