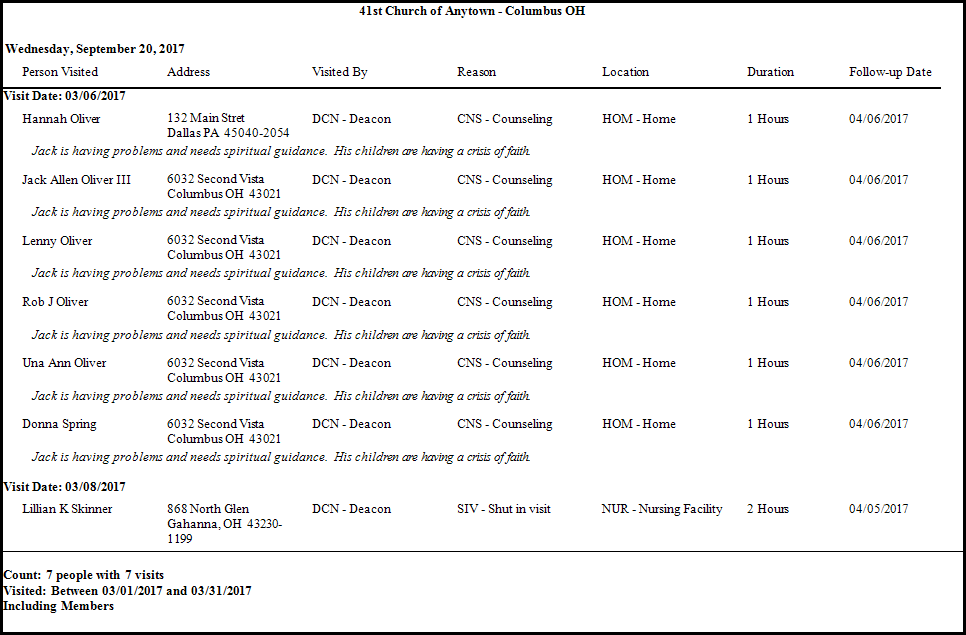
Visits Report
In
Church Windows, you may create reports based on
Visits information in a few different ways:
To view or print the Visits Report:
- From The Initial Portal of Church Windows choose Membership then either:
- Click Reports / Export in the Button Bar at the top of the screen and click the Reports & Labels button.
- Choose either Reports / Directory / Exports or Labels to open the Step 1 — Select who should appear on the report screen.
- Click the People Selection Criteria button.
- In the Select a Membership field box, choose [Visits].
- The Visits Selection screen will appear:
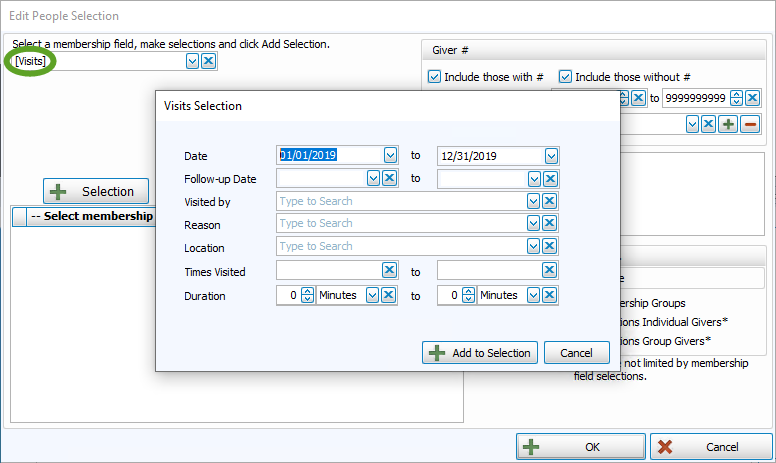
- This will allow you to limit the report to people who meet the criteria you enter on this window, if you want to print a Visits Report for a single person, use method 2 or 3 instead, explained below.
- Click Reports / Export in the Button Bar at the top of the screen and click the Visits button.
- From the choose Visits and click the Print Visits button in the top right corner.
OR
OR - With option 2 or 3, the Visit Print Options screen will appear:
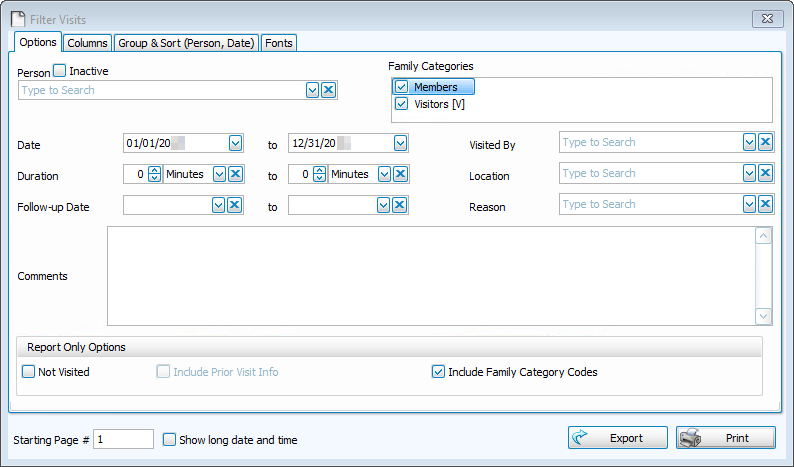
Options tab
- Person
- Family Categories
- Report Only Options
- Visit Date
- Follow-up Date
- Visited By
- Reason
- Location
Start by selecting someone in the Person field either by using the dropdown or by starting to type in the search bar. If you wish the report to include inactive persons who have been visited or not visited, put a  checkmark in the Include Inactive box.
Using either reporting method, you may limit reports to include visits to people who are entered in a specific Family Categories (Members, Visitors, etc. only) or visits to All people. Click the appropriate checkbox(es) at the top right of this screen to make your selection.
If you would like your report to include those people who did NOT receive a visit instead of those who did, then click in the Not visited box at the bottom left to mark it with a checkmark. Because you enter a date range for when they have not been visited, it is possible that some had visits prior to that date range. If you wish your report to include dates and reasons for prior visits, put a checkmark in Include prior visit information. If you do not want that information included, uncheck
Include prior visit information.
You may limit your report to include only those visits within a certain time frame. Enter that range into these boxes. The dates will default to the current year. You may change them to include prior years. (Use a MMDDYYYY date format WITHOUT slashes.)
You may create a report to include only those people who are scheduled for a follow-up visit in a certain time period. If you wish, enter these dates into the boxes. (Use a MMDDYYYY date format WITHOUT slashes.)
You may include on this report only those people who were
Visited By a certain pastor or staff member. To see a list of those pastors or staff members available, click the  dropdown button. This list will include those people who have been entered into the Visited By list in the Visits
Module. Select a person by clicking on their name in the list.
dropdown button. This list will include those people who have been entered into the Visited By list in the Visits
Module. Select a person by clicking on their name in the list.
You may choose to limit your report to those people who were visited for a specific
Reason. To see a list of all available reasons, click the dropdown button. This list will include only those reasons that have been entered into the Reason list in the Personal Visits
Module. Select a reason by clicking on it.
You may also limit your report to those people who were visited at a specific
Location. To see a list of all available locations, click the dropdown button. This list will include only those places that have been entered into the Location list in the Personal Visits
Module. Select a location by clicking on it.
Note:
If any of these fields are left blank, they will have no effect on the records included on the report.
Choose any of the following tabs to apply additional settings:
Columns TabDetermines the order and the appearance of the columns displayed.
Sort Tab
Organizes the information into the desired order (and groupings).
Fonts Tab
Sets the style and size of the typeface used to display the contents of the report.
Once you have made all of your selections, click Print to view a Print Preview and then proceed in sending the file to your printer. You can also Export most reports and/or Send via Email as a file to be used outside of Church Windows.