Labels
Use the Labels feature to generate labels, such as mailing labels and name tags. You can access this function from various places throughout Church Windows.
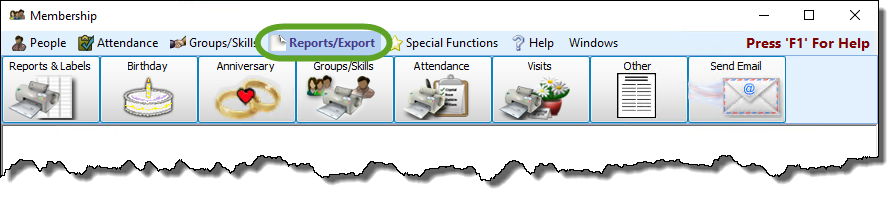
From the Membership Module:
- Click the for Labels.
OR
- Click Reports/Export in the Button Bar at the top of the screen.
- Then, choose the specific report you would like to run and then select Labels.
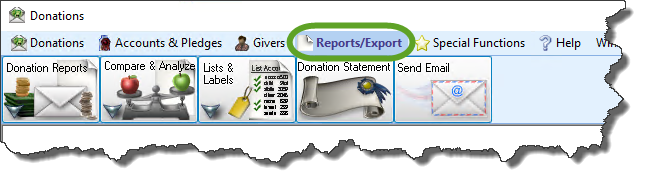
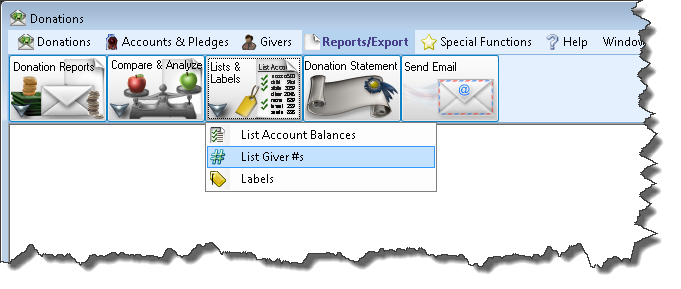
From the Donations Module:
- Click Reports/Export in the Button Bar at the top of the screen.
- Then click Lists & Labels.
- Then click Labels.
Step 1 — Select who should have labels printed
The window will open to the Query Builder tab. This is the first step in creating your labels:
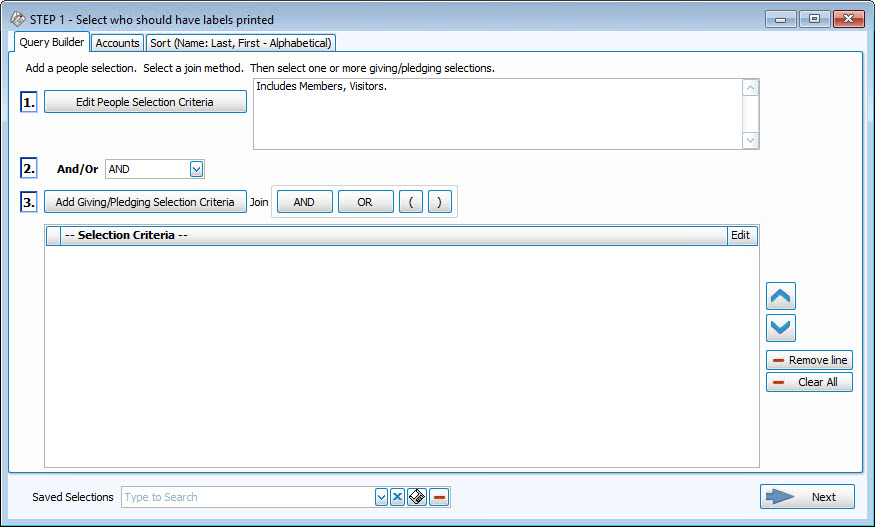
There are 4 available search criteria options for your labels:
A separate window will open to the People Selection Criteria. This is the first step in creating your labels.
Select a Membership Field
Choose any field in The Individual Record or The Family Record to compile a search query limiting the people who will be included on the report. To include everyone, do not make any selections.
The different Field Types will provide different "operator" choices, such as:

OR

The selections at the top of the list in [brackets] will open a separate window for your to enter your criteria, then press the 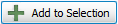 'Add to Selection' button to return to the People Selection Criteria screen. These selections include: In the Select a Membership field box, choose [Attendance]. , A separate window will open where you can select your desired [Groups / Classes]: Note:In either method, you may limit the Groups/Classes selection to any combination of Past, Present, or Future members by checking or unchecking the respective boxes., Or [Skills / Interests]:, In the Select a Membership field box, choose [Visits]. , or [Last Created/Updated]:
Once you make a Membership Field Selection, to add it to the search criteria click on the  'Add Selection' button. It will add it to the -- Select membership Individuals fitting these criteria -- box below.
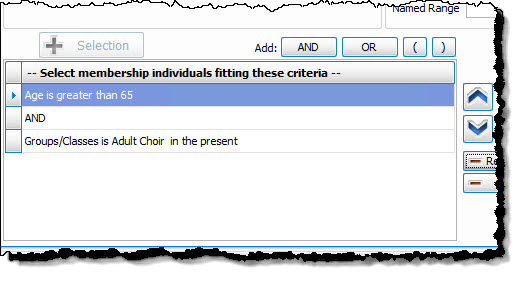
For example, if you want to add ages greater than 65 to the criteria, just use the Membership Field dropdown to select Age like above, then select the "greater than" operator, and put 65 in the first box. Then click on the

Once you have at least one criteria added to your selection, you can either continue selecting other options for the report with just one criteria, or use the Membership Field dropdown again to select additional options.
Before you can click on the  button to add additional criteria, you must either click the AND or the OR button to the right of the button to specify how you want the selections applied:
- AND — Use to search for people who meet BOTH of the criteria, allowing less people to be included.
- OR — Use to search for people who meet EITHER of the criteria, allowing more people to be included.
- For more complex searches, you can also add parentheses to select people meeting either or both of several different combinations of criteria selections.
Then you will be able to click on the button.
So for this example,
- Select age greater than 65
- Then click the
- Then select Groups / Classes and choose those presently in the adult choir
- Then click "AND"
- Then click the
- If you would like to include all Givers, regardless of whether the Giver has a giving number stored on record, make sure that a
 check mark is placed in both Select Givers with # and Select Givers without # boxes. Otherwise, place a check mark in only one of the two boxes. (If needed, see Assign Giver Numbers)
 - Use the Giver # Range boxes to choose the range of Giver numbers for the labels or statements you want to print.
- If you have saved a Giver # Range in the past and would like to reuse it, select it from the Named Range box.
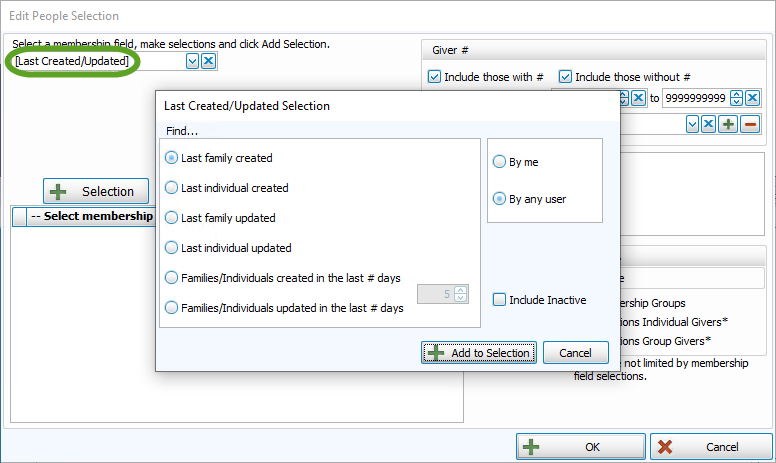
- You can also add a new Named Range by clicking the
 Add button. Or, if you no longer need a Named Range that currently exists in the list, select it and click the
  button.
Categories
If you wish to exclude Visitors (or people in other Family Categories you may have added), click the  checkbox to uncheck the Categories you do not want to see on the report.
Include...
- If you wish to include Inactive givers in the report, click the box to place a checkmark. With a checkmark in the box, the report will show both of the following:
- Givers that have been marked as Inactive on the Manage Givers screen of the Donations Module.
- Givers that have been marked Inactive with an Inactive Reason (formerly Reason for Termination) on
The Individual Record in the
Membership Module.
- Place a checkmark in the boxes if you also wish to include:
- Membership Groups / Classes,
- Donations Individual Givers*
- Donations Group Givers*
(The asterisk * next to Donations Individual and Group Givers indicates that the Membership criteria selections will not be applied to them and they will be included on the report regardless.)
Once you have entered all options necessary for the people you would like to see, you can continue on to the next tab, Giving / Pledging.
The Giving / Pledging Selection Criteria allows you to select options to show those who did or did not give or pledge, or to show certain date ranges for the Givers and/or pledgers. There are also options to select to show the different combinations of types of Pledges.
Giving — Include
Choose the option that best describes the Giving information you wish to see:
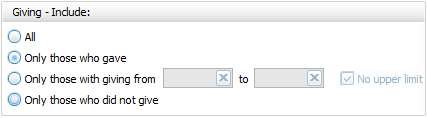
- All — Click this option to have all kinds of Givers regardless of their giving included.
- Only those with giving from — Enter a desired range of donation dollar amounts that you would like to include. If the range has no maximum amount, place a check in the No Upper Limit box.
- Only those who gave
- Only those who did not give
AND / OR
Between the Giving — Include and Pledging — Include areas of the screen, use the AND / OR dropdown box to specify how the criteria must be fulfilled:
- AND — Use to search for people who meet BOTH of the criteria, allowing less people to be included.
- OR — Use to search for people who meet EITHER of the criteria, allowing more people to be included.
Pledging — Include
Choose the option that best describes the information regarding Pledges that you wish to see on your report:
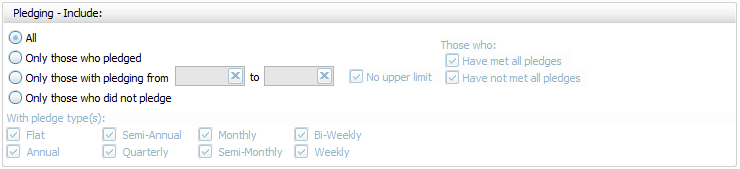
- All Givers — Includes all Givers regardless of Pledging.
- Only those with pledging from — Enter a desired range of pledge dollar amounts that you would like to include. If the range has no maximum amount, place a check in the No Upper Limit box.
- Only those who pledged
- Only those who did not pledge
- Those who:If applicable, place or remove a checkmark for Have Met All Pledges and/or Have Not Met All Pledges.
- With Pledge Type(s): Place a checkmark next to any or all frequencies of pledges you want to include on the report.
Other Options
At the top right of the Giving / Pledging tab there are sometimes a few more options, these include:

- Receives Statement — specify if you only want to see those who do or only those who do not receive statements. (This is not an option on Statements as Givers without "Receives Statement" checked cannot be included)
- Giving as a Family or Giving Separately — specify if you only want to see those who give alone or only those who give as a family.
- Date Range — select the time period that you want the report to present.
- Show Giver totals — if you want to see a total for each Giver on the report.
- Summary only — if you want to see only the summary, instead of an accompanying, individualized listing by Giver.
This tab lets you decide which Donations accounts you do or do not want to show on your report. You can use the Campaign dropdown at the top to print only particular Campaign Pledges. As in other reports in Church Windows, you can use the  left and
  right arrow buttons in the middle, or just double click on the actual accounts to bring them back and forth between the Available account side and the Selected account side. You could also click on the Select All or Clear All buttons to move the entire list of accounts back and forth.
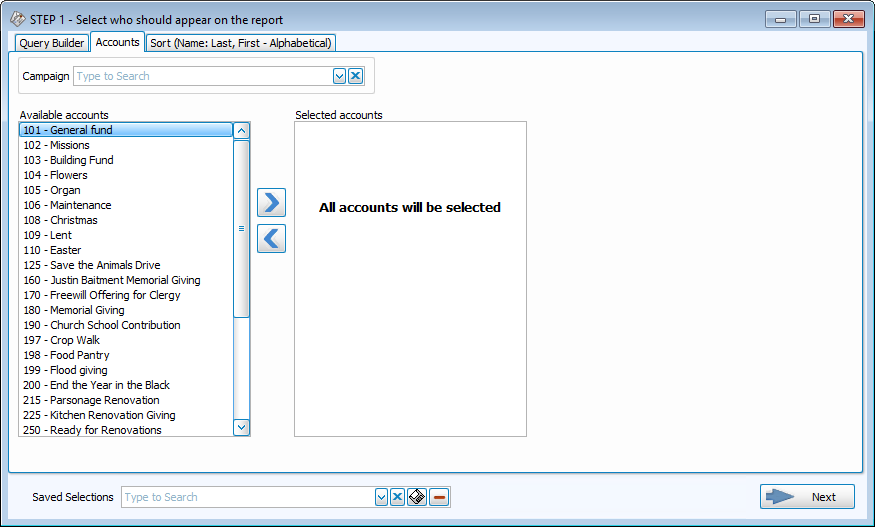
Once the account list is correct for what you would like to see, you can continue to the last tab, the Sort tab.
The Sort Tab does not relate to which criteria you have selected. It simply gives you options to sort the labels in a different order when they are printed, regardless of what criteria is selected on the other tabs.
Note:
Once you have selected the appropriate criteria in any tab(s), you have the ability to save the all selections you have made in all the tabs by clicking on the  floppy-disc button to the right of the Saved Selections field at the bottom, at any time, no matter which tab you are in, and name it appropriately. From that point on, you can access that specific search criteria any time you go back into this screen.
Clicking on the → Next button at the bottom will bring you to the Label Layout screen:
Step 2 — Select the Label Layout
This is where you can specify how the label will look and what information it will include:

Options tab
Date of Mailing
If you are printing labels to send on another date besides today, enter a date here so that the correct address is used if you have people with Alternate Addresses during particular date ranges. For example, if someone is in school for the fall, it will then know to send it there if the mailing date is within that time frame.
Label Layout
Use the dropdown to see the preloaded label formats and choose the specific label type you are using:

The "[Template] Avery 5160 With Mailing Label" layout will contain whatever you have entered into the "Mailing Label" field on The Family Record and will look something like this:
MR AND MRS JAKE KNOX
7314 MAIN BLVD
GAHANNA OH 43230-2155
The "[Template] Avery 5160 With Name(s)" layout will contain the first and last name of the selected individual(s) and will look something like this:
JAKE, SARAH, JUDITH, NATE KNOX
7314 MAIN BLVD
GAHANNA OH 43230-2155
If you need to customize or modify a Label Layout, you can click on the
button to the right. This will open the Report Designer that is available from other reports, and here you can customize which fields you want, where you want them, and the sizes/styles of any field and save an alternate copy of the original layout.
If there is not a Label Layout that meets your needs such as the label brand or size itself, you can start from scratch by clicking on the
button:
New Label
- The Label Wizard is a set of screens that help you define new labels, so that you can select the Label Layout name on the Labels screen and continue with the printing of your labels.
- Specify the Label Information by choosing one of the Label Products and its Product Number from the dropdown lists. Most standardized labels are in this list. The section beneath the dropdown boxes will display the dimensions for the Label you selected:
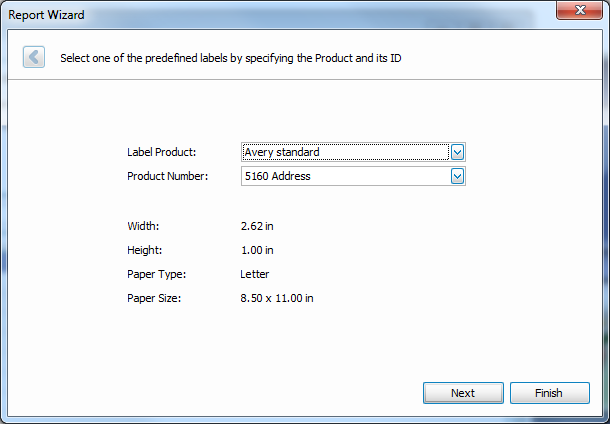
- Click Finishwhen done, unless you need to make more specific changes to the layout of the label, such as its Width, Height, Pitch, Margin, or Page size in which case you can click → Next and use the diagram to verify/adjust the label you chose (usually not necessary), then click Finish.
- The wizard will pull up the Report Designer screen where you can verify the layout for the label and field for the text that the Label Layout is supposed to print. This is also where you can add barcodes if you are Using Postage $aver with Church Windows. When you are finished, click the Save button at the top of the screen.
- Close the Report Designer screen and use the Label Layout dropdown box on the Step 2 Labels screen to choose the layout you set up on your labels.
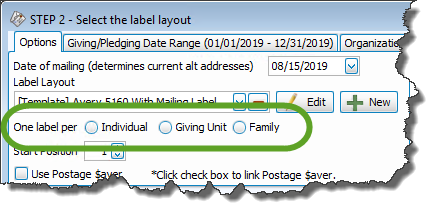
One Label per
Click the option to prepare separate labels for each: Individual, Giving Unit (for people set as Gives with Family), or Family:
Start Position
If needed, enter a number in the box; this would be the number of previously used labels on first page. If you have a full page of blank labels that are available for material to print on them, make sure you have this number set to 0.
Note:
The last time you printed labels using the same label paper, you might have used up a certain amount of labels. If this is true in your case, your first sheet of labels is not going to have labels available. Instead of wasting a sheet of paper, you can show the software to start at the first unused label, and therefore make use of the rest of the labels on the page.
Label Options tab
- Uppercase Text for Mailing
If you are printing labels for another purpose besides mailing, you can uncheck the box to print in both upper and lower case instead of the default of only uppercase. Keep in mind, however, that according to the USPS Publication 28 (which is the official guide on postal addressing standards) all uppercase addresses are preferred though it is not a requirement.- Include Year on Birth Date
If you choose a Label Layout that has birth dates on it, this box allows you to either include or exclude the year on the label.- Include Additional Family Members
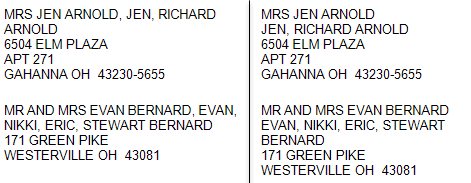
To include the names of any additional family members you may have added using the Link another child to this family function, place a check in the box to the right of the "One label per" selection.- Print 'Names' on Separate Line
When you use a Label Layout that includes both the Mailing Label and Individual Names, this option allows you to have the names of the individuals print on a separate row on the label (box unchecked on the left, box checked on the right):Unlisted Options tab
When Phone, Email, or Addresses are marked as Unlisted you can use this tab to determine whether or not they will print on reports and, if so, to include and asterisk * if they are Unlisted:
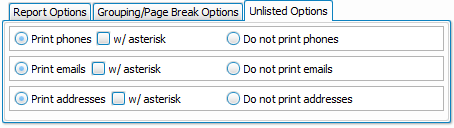
On most reports, they are included by default, however on Directories the default is Do not print.
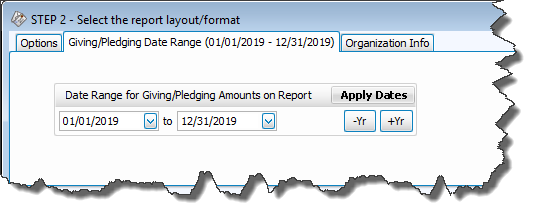
Giving / Pledging Date Range tab
This tab allows you to select a different date range to print on the report than the selections you made in Step 1 — Select who should appear on the report for the Giving / Pledging Selection Criteria
Organization Info tab
If the Label Layout you selected uses a certain name to represent the
Organization Info
, select the desired options.
Unless otherwise specified, your
Church name will appear at the top of the report as you initially entered it into
the
Organization Info
stored in System Information in the Administration area of Church Windows. If you need to create additional sets of Organization Information, click the Add button. Or, select an existing name from the Org. Info box and click either  Edit to change it or Delete to remove it from the list.
Select People
The list at the bottom of the screen shows all the people that met your search criteria. Because all people in the list have a checkmark next to their names, their information will print on the label. If there is a specific person or people for whom you do not want to print a label, click to remove the checkmark that appears next to the desired name(s) or use the Check All/Uncheck All buttons at the bottom.
Once you have made all of your selections, click Print to view a Print Preview and then proceed in sending the file to your printer. You can also Export most reports and/or Send via Email as a file to be used outside of Church Windows.

