Send Email
Sending emails from Church Windows is a similar process to other Reports / Directory / Exports with some unique features.
- From The Initial Portal of Church Windows choose either Membership or Donations
- Click Reports / Export in the Button Bar at the top of the screen
- Click Send Email
-
This will open the Email window:
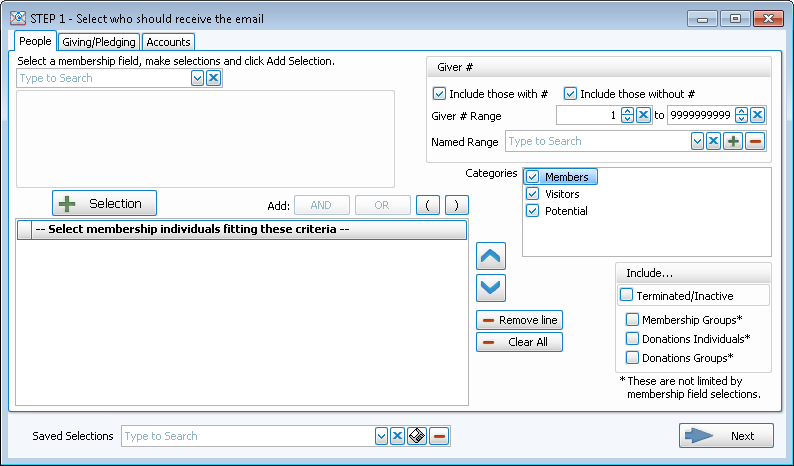
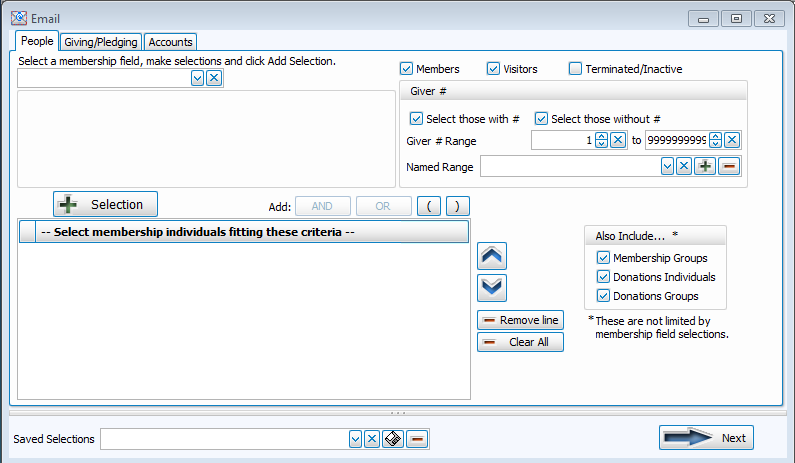
 Step 1 — Select who should receive the email
The following tabs allow you to select which people you want to receive the email:
Select a Membership Field
Choose any field in The Individual Record or The Family Record to compile a search query limiting the people who will be included on the report. To include everyone, do not make any selections.
The different Field Types will provide different "operator" choices, such as:

OR

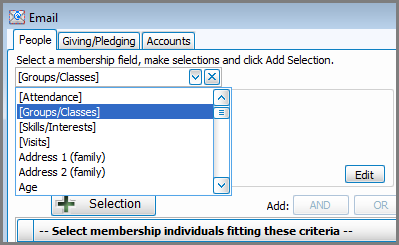
The selections at the top of the list in [brackets] will open a separate window for your to enter your criteria, then press the 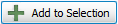 'Add to Selection' button to return to the People Selection Criteria screen. These selections include: In the Select a Membership field box, choose [Attendance]. , A separate window will open where you can select your desired [Groups / Classes]: Note:In either method, you may limit the Groups/Classes selection to any combination of Past, Present, or Future members by checking or unchecking the respective boxes., Or [Skills / Interests]:, In the Select a Membership field box, choose [Visits]. , or [Last Created/Updated]:
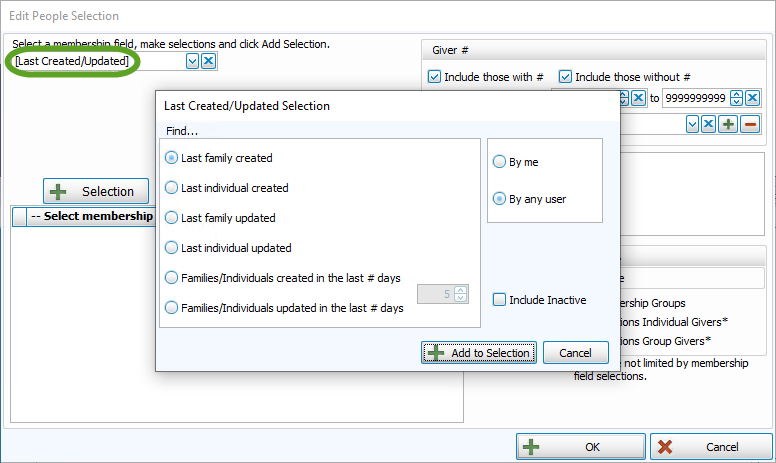
Once you make a Membership Field Selection, to add it to the search criteria click on the  'Add Selection' button. It will add it to the -- Select membership Individuals fitting these criteria -- box below.
For example, if you want to add ages greater than 65 to the criteria, just use the Membership Field dropdown to select Age like above, then select the "greater than" operator, and put 65 in the first box. Then click on the

Once you have at least one criteria added to your selection, you can either continue selecting other options for the report with just one criteria, or use the Membership Field dropdown again to select additional options.
Before you can click on the  button to add additional criteria, you must either click the AND or the OR button to the right of the button to specify how you want the selections applied:
- AND — Use to search for people who meet BOTH of the criteria, allowing less people to be included.
- OR — Use to search for people who meet EITHER of the criteria, allowing more people to be included.
- For more complex searches, you can also add parentheses to select people meeting either or both of several different combinations of criteria selections.
Then you will be able to click on the button.
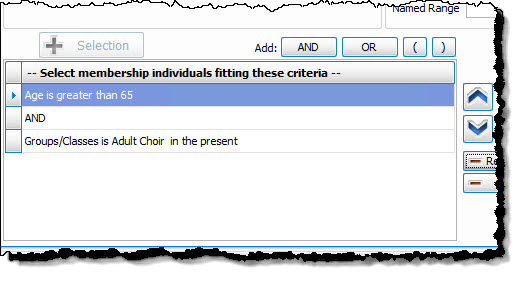
So for this example,
- Select age greater than 65
- Then click the
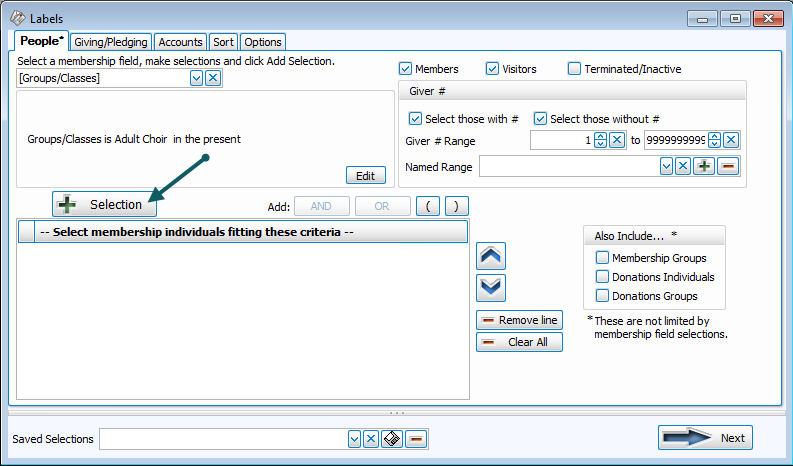
- Then select Groups / Classes and choose those presently in the adult choir
- Then click "AND"
- Then click the
- If you would like to include all Givers, regardless of whether the Giver has a giving number stored on record, make sure that a
 check mark is placed in both Select Givers with # and Select Givers without # boxes. Otherwise, place a check mark in only one of the two boxes. (If needed, see Assign Giver Numbers)
 - Use the Giver # Range boxes to choose the range of Giver numbers for the labels or statements you want to print.
- If you have saved a Giver # Range in the past and would like to reuse it, select it from the Named Range box.
- You can also add a new Named Range by clicking the
 Add button. Or, if you no longer need a Named Range that currently exists in the list, select it and click the
  button.
Categories
If you wish to exclude Visitors (or people in other Family Categories you may have added), click the  checkbox to uncheck the Categories you do not want to see on the report.
Include...
- If you wish to include Inactive givers in the report, click the box to place a checkmark. With a checkmark in the box, the report will show both of the following:
- Givers that have been marked as Inactive on the Manage Givers screen of the Donations Module.
- Givers that have been marked Inactive with an Inactive Reason (formerly Reason for Termination) on
The Individual Record in the
Membership Module.
- Place a checkmark in the boxes if you also wish to include:
- Membership Groups / Classes,
- Donations Individual Givers*
- Donations Group Givers*
(The asterisk * next to Donations Individual and Group Givers indicates that the Membership criteria selections will not be applied to them and they will be included on the report regardless.)
Once you have entered all options necessary for the people you would like to see, you can continue on to the next tab.
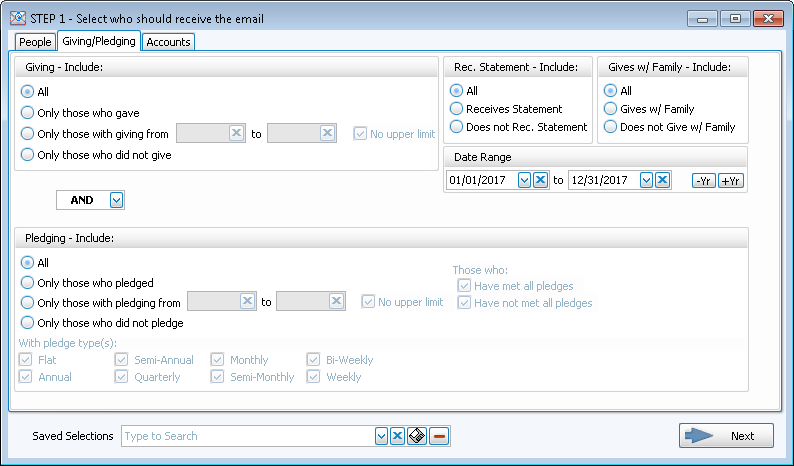
This screen allows you to select options to show those who did or did not give or pledge, or to show certain date ranges for the Givers and/or pledgers. There are also options to select to show the different combinations of types of Pledges:
This tab lets you decide which Donations accounts you do or do not want to show on your report. You can use the Campaign dropdown at the top to print only particular Campaign Pledges. As in other reports in Church Windows, you can use the  left and
  right arrow buttons in the middle, or just double click on the actual accounts to bring them back and forth between the Available account side and the Selected account side. You could also click on the Select All or Clear All buttons to move the entire list of accounts back and forth.
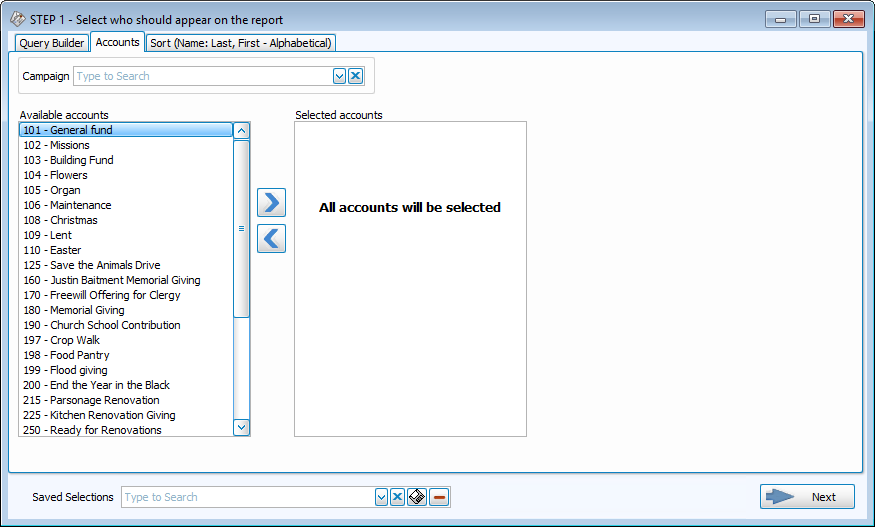
Note:
Once you have selected the appropriate criteria in any tab(s), you have the ability to save the all selections you have made in all the tabs by clicking on the  floppy-disc button to the right of the Saved Selections field at the bottom, at any time, no matter which tab you are in, and name it appropriately. From that point on, you can access that specific search criteria any time you go back into this screen.
Once your selections are made, click the → Next button, which will bring you to the Step 2 screen.
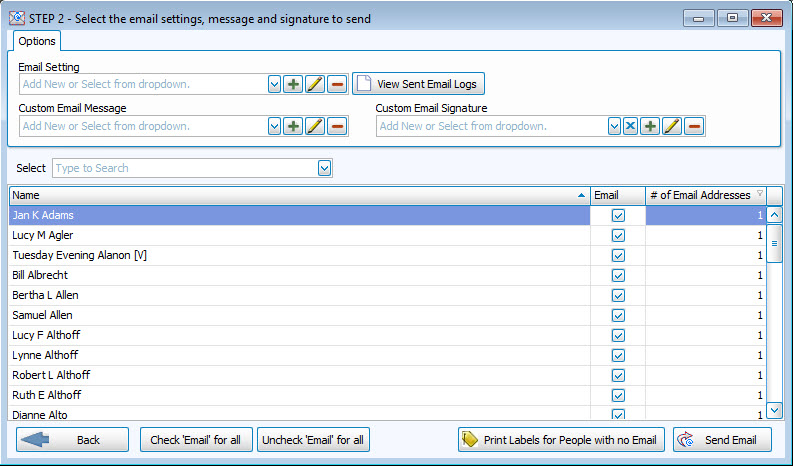
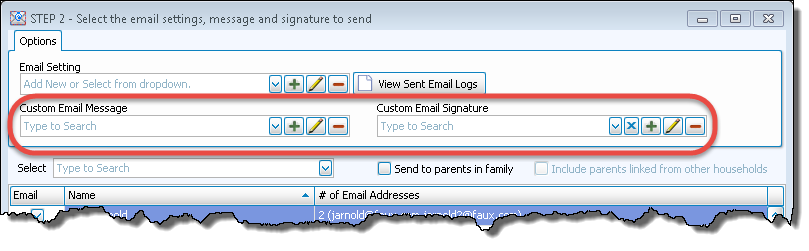
Step 2 — Select the email settings, message and signature
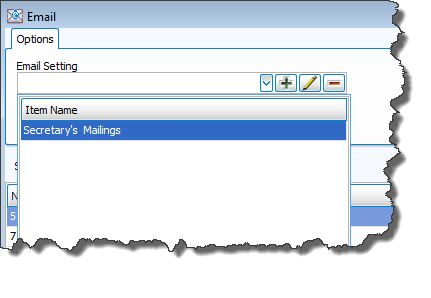
If you have not yet setup your Email Settings, click here to see Setup Email information. Otherwise, click the  dropdown to choose the Email Setting you want to use:
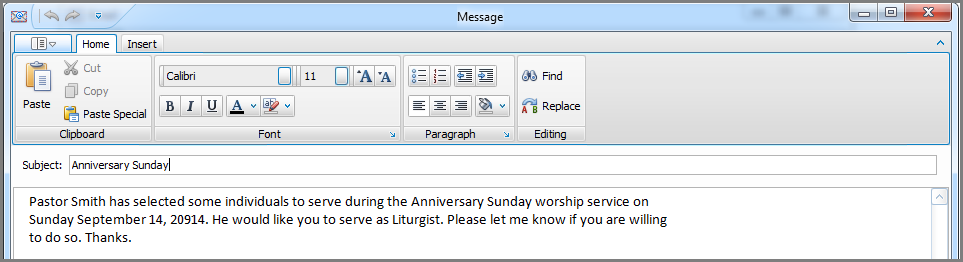
- To enter a new email message, click the Add button beside Email message.
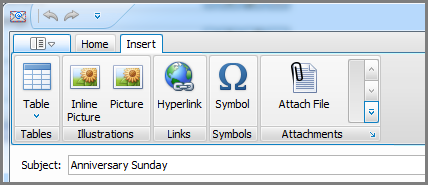
- Compose the email message and enter a Subject if you choose to. The Home tab allows you to set use standard word processing options — such as setting the font style and size, changing the color of the text, etc.
- The Insert tab allows you to insert picture or symbols or files in the email.
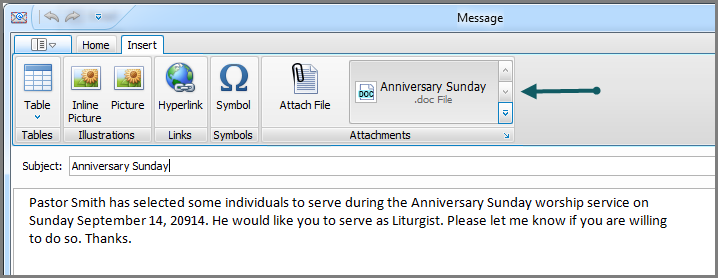
- Here we have attached a file (such as a PDF newsletter) to the email.
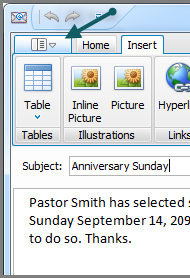
- Once the email is ready, click on the Options tab to send the email.
- You see the many options available. Click the one of your choice:
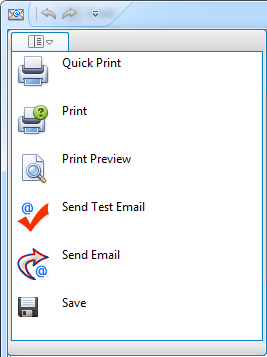
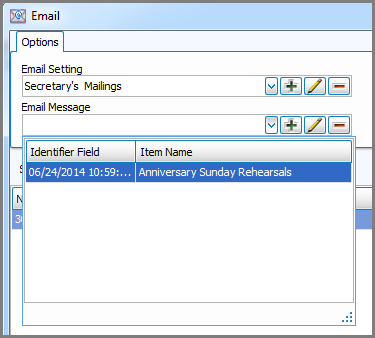
- If this is a message you might use again, after entering or sending the email, click to Save it.
- The system will confirm that it has been saved:
- Saving the email means that you will be able to call it up, make any necessary edits to it, and send it again.
- To send the email, click Send Email.
- Repeat the exact same process that you followed to compose your message to compose your Custom Signature, if needed.
Re-use a saved Email Message and/or Signature
- Click the dropdown button in the Email Message box:
- Click the desired saved message to select it.
- You can also click the
 Edit button to edit the message before sending, if necessary.
 - Click Send Email.
Emailing the Parents of Children
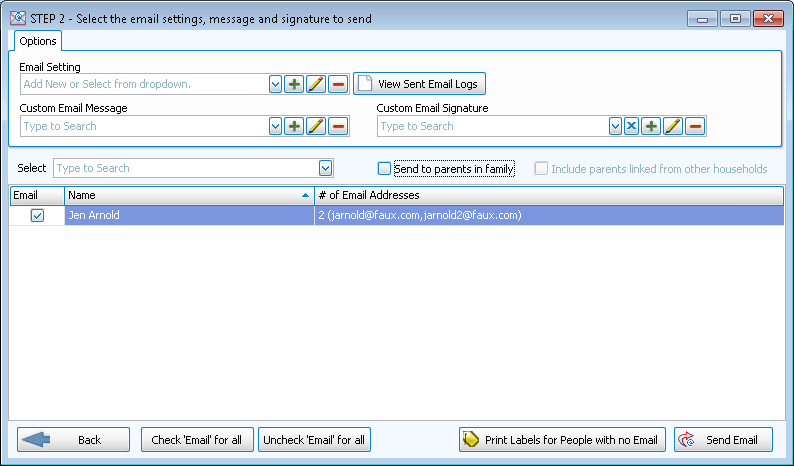
You are now able to email just the parents of the children in a family! All you need to do is check the "Send to parents in family" box on the Step 2 — Select the email settings, message and signature screen:
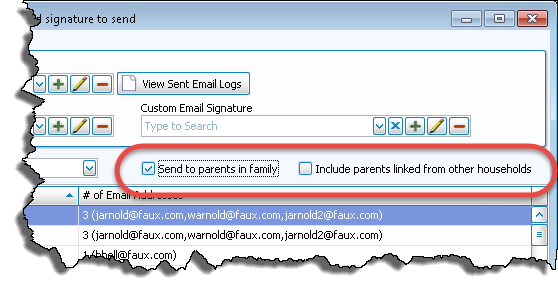
- This will use the email address(es) of the 1 — Primary and 2 — Secondary family member(s) only.
- If you wish to send emails to both the parents and the children, you will need to send two separate emails.
- You can also check the box to "Include parents linked from other households" if you have used the Link another child to this family feature to link children to multiple households and you want those parents included in the email as well.
Select People
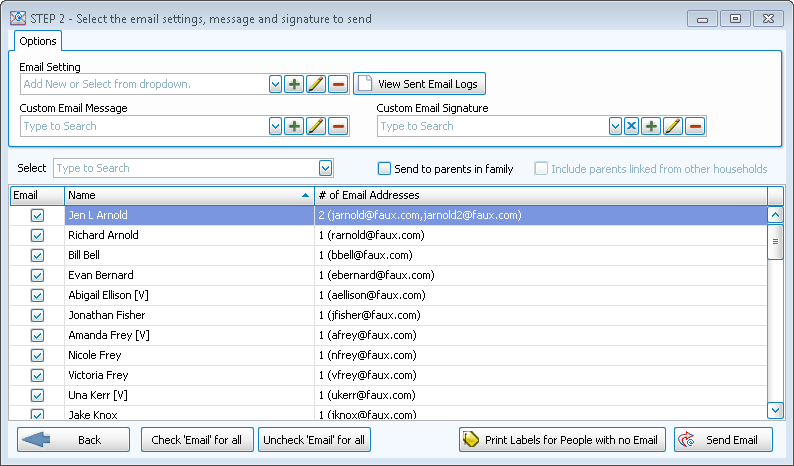
The bottom half of this window allows you to do a final select and/or deselect of people and/or groups to be included on the email:
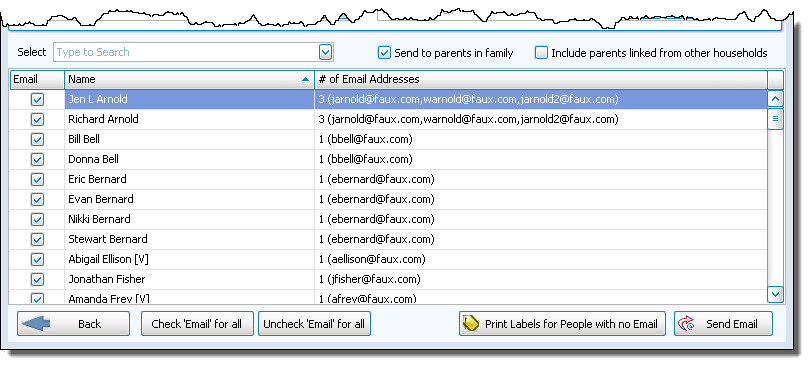
This list contains every person, group, class, etc. that meets the criteria of your search parameters. They will all default to having a check in the Email column so that they will appear on the report. However, if you want to deselect anyone or anything, you can take the check out of the box to exclude them from your report. There are buttons at the bottom to "Check 'Email' for all" or "Uncheck 'Email' for all" with a single click, along with a ← Back button if you need to return to make changes to the report criteria in Step 1 — Select who should appear on the report.
Finally, there is a button allowing you to print labels to mail a hard-copy of your email to people who meet your search criteria but who do not have email addresses on file. Click the Print Labels for people with no Email button to continue through the Labels procedure for those individuals.
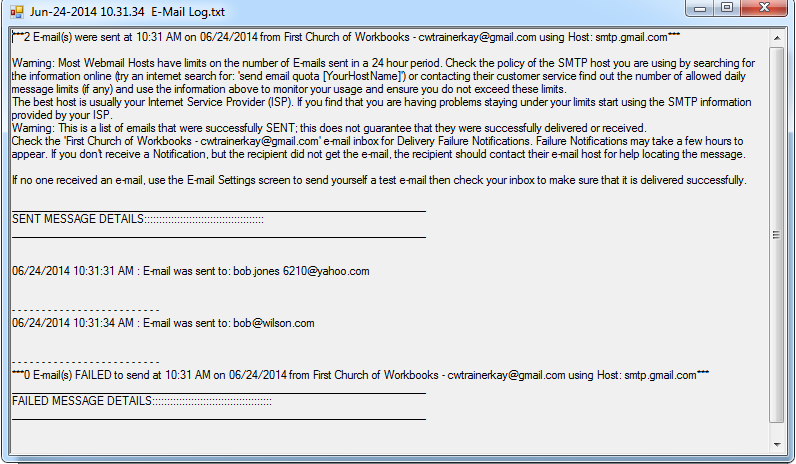
After you send emails out of Church Windows, it creates a Log Report with the results, providing information on each of the emails sent and the details of any emails that have failed to send. You can click the "View Sent Email Logs" button to open the log report for any emails you have sent:
Email examples
In order for an individual in The People File to be emailed, the recipient must have a valid email address. In addition, people entered into the Membership database could have more than one email address. For example, you might have a second email address field for a work email address.
InMembership, find the person’s Family and Individual record:
- Click the Print, Map, or Copy Individual Info button and choose Email:
- The email screen opens and the individual’s name shows in the bottom of the screen:
- Continue by selecting or composing a message, as explained above.
The Adult Choir will have an extra rehearsal on a certain date at a certain time in the Choir Room. Email the members a reminder notice!
- From The Initial Portal of Church Windows choose Membership
- Click Email from the
- The Email window will appear:
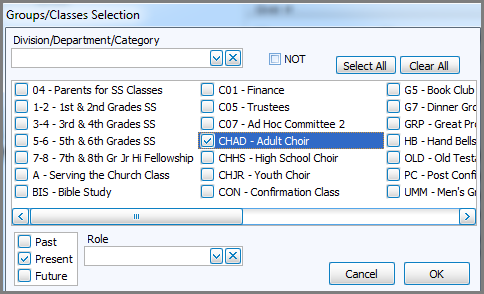
So, in this example, to select the people enrolled in a specific Group or Class:
- Click the
- Click to place a checkmark in the box for each group to be emailed:
- After selecting the group(s), click OK and then click the
button:
- Because we have asked for a specific Group or Class, we leave checked the boxes for all Categories. The system will pull only those people enrolled in the selected class.
- When you're finished, click the → Next button.
The Step 2 — Select the email settings, message and signature screen opens. We see the names of the people in the group(s) we selected:
- Select the appropriate email address from the Email Settings dropdown list or add a new one, if needed.
- Click the
- Click Send Email to send the email.

Note:
If your Church sends bulk emails, go to our website — www.churchwindows.com — hover your mouse over Investigating at the top of the screen. In the CW Partners section, click to read about using our partner Constant Contact for your bulk emails.
