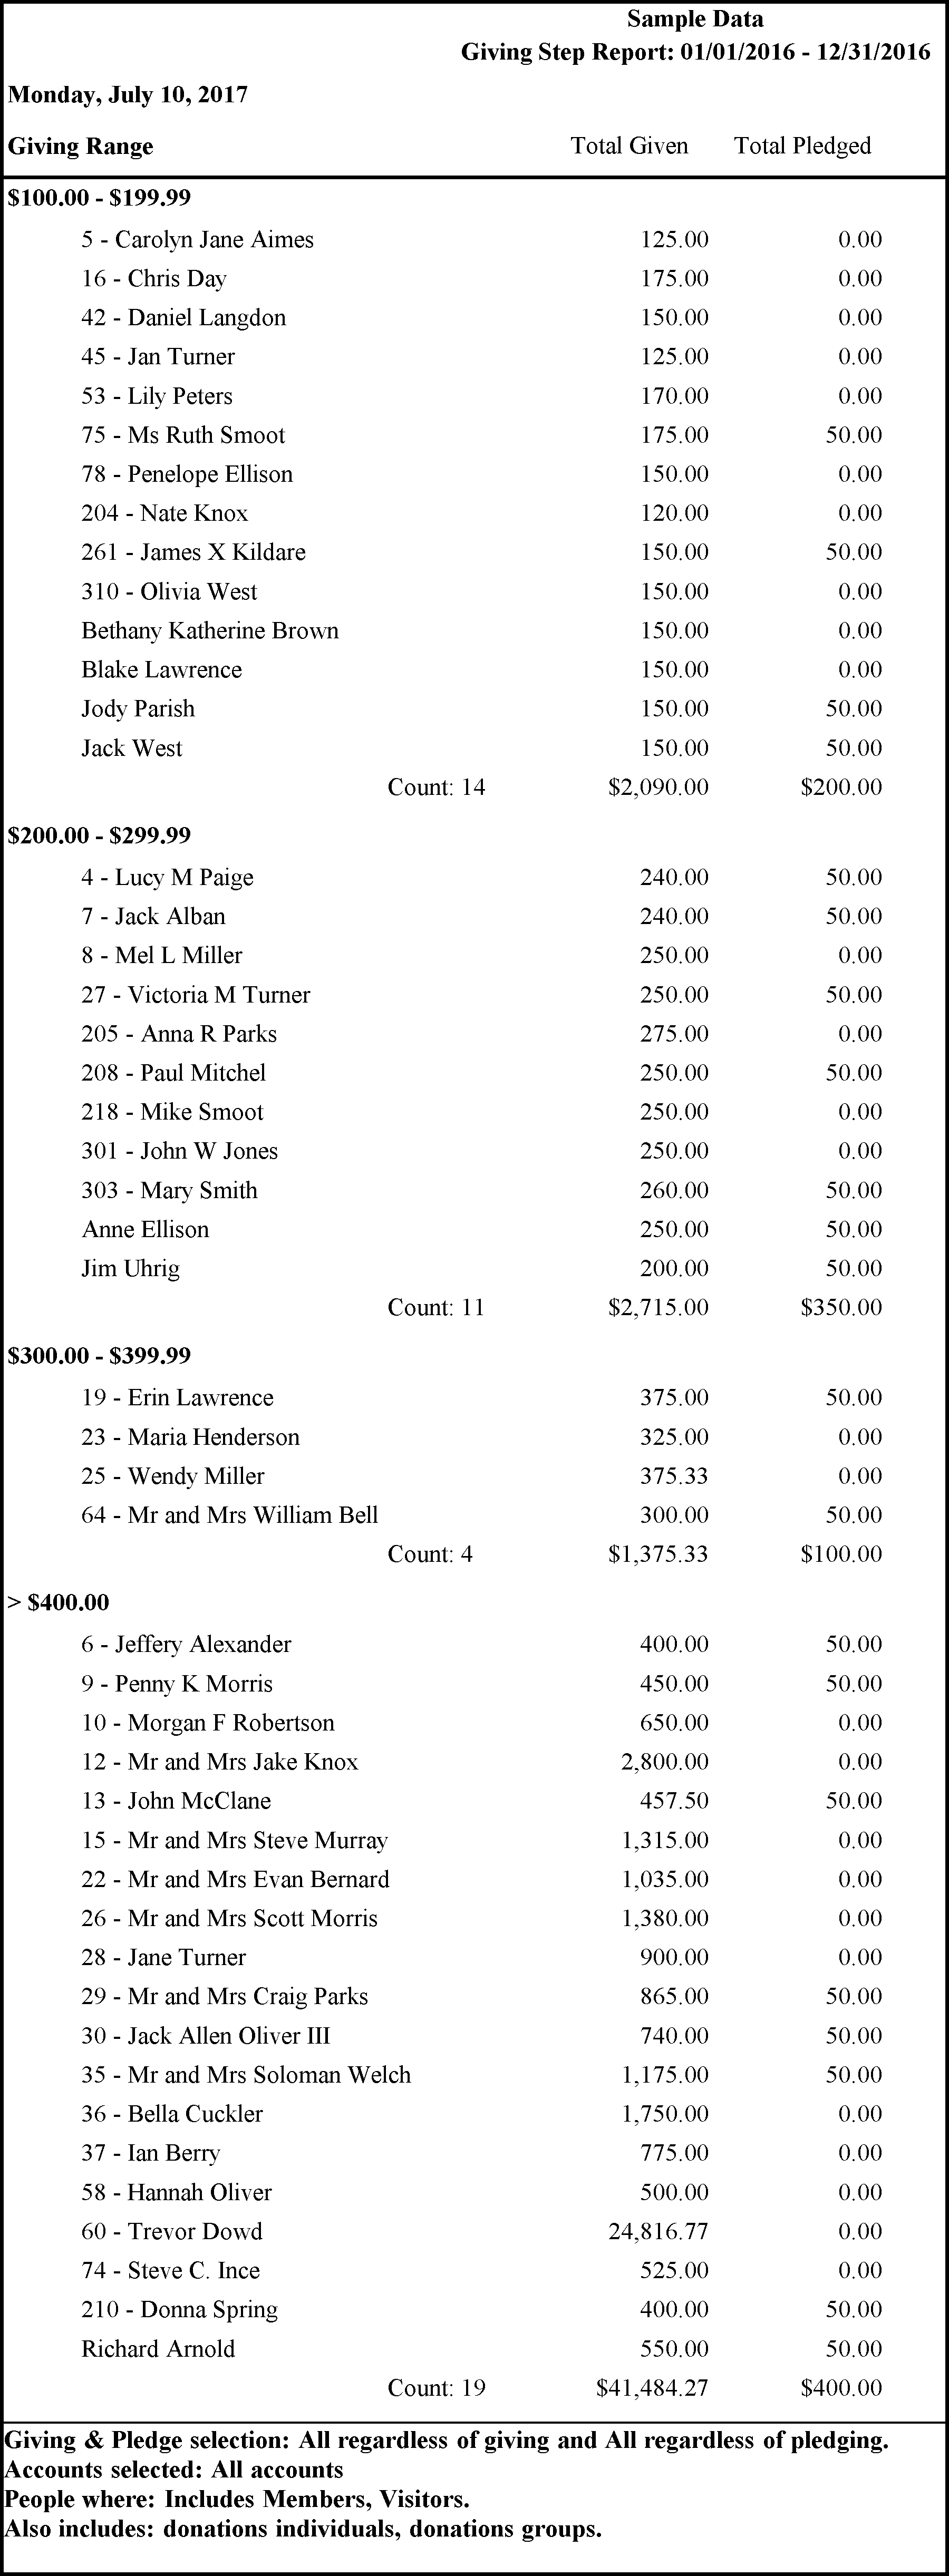
Step Report
The Step Report breaks down either giving or pledge amounts into levels, or steps, and presents the number of people in the congregation who give or pledge within each step.
To view or print the Step Report:
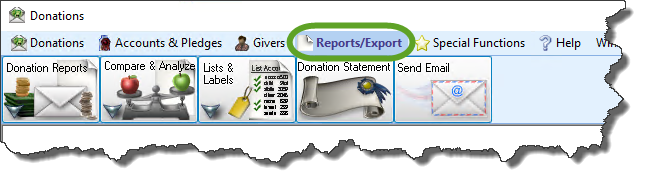
- Click Reports/Export in the Button Bar at the top of the screen.
- Click the Compare & Analyze button that appears below.
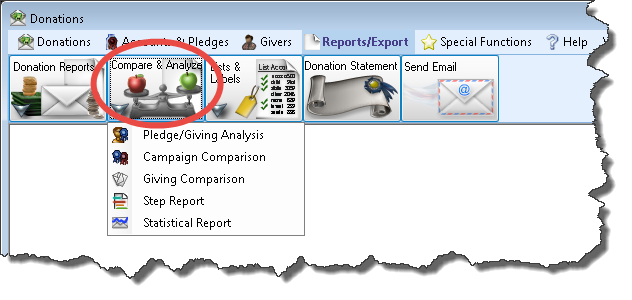
- Click the Step Report button that appears in the adjacent menu.
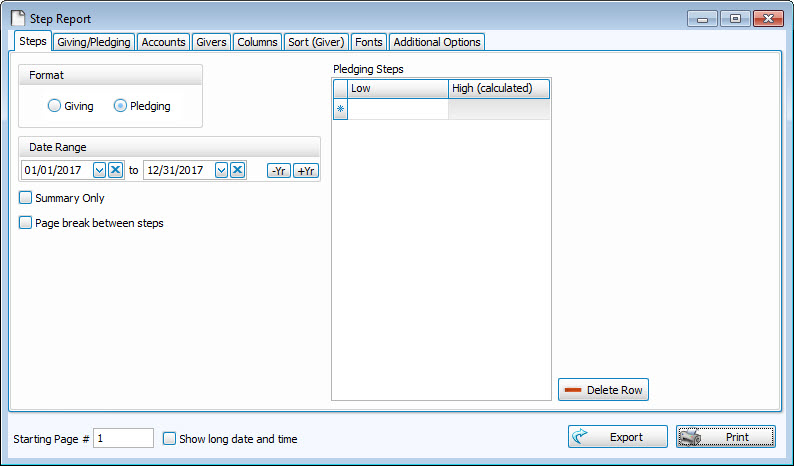
- Choose the format of your report by clicking either Giving or Pledging.
- Choose the Date Range for the report.
- Choose any of the following options as they apply to your requirements of the report:
- Summary Only: Place a checkmark in this box if you want only the total amounts for each step.If you do not place a checkmark in this box, each step of the report will also present all who gave or pledged an amount that falls within the step.
- Page break between steps: Place a checkmark in this box to start a new page of the report for each step. If you do not place a checkmark in this box, the information will completely fill each page.
- On the right side of the screen, enter the Giving Steps or Pledging Steps, depending on the kind of Step Report you plan to run:
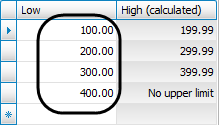
As you enter the beginning "Low" dollar amount for each step, the ending "High" dollar amount for each preceding step will automatically adjust. And, the beginning "Low" amount for the last step that you enter will then include any dollar amount beyond it, and indicate on the screen that the step has no upper limit.Note:
If you need to remove a step, click the line and hit the Delete Row button.
Choose any of the following tabs to apply additional settings:
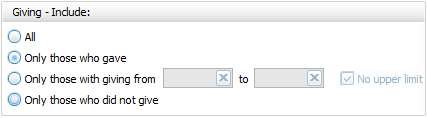
Giving — Include:
Choose the option that best describes the Giving information you wish to see on your report:
AND / OR
Use the dropdown to specify how the criteria must be fulfilled in order to generate your report:
- AND — Use to search for people who meet BOTH of the criteria, allowing less people to be included.
- OR — Use to search for people who meet EITHER of the criteria, allowing more people to be included.
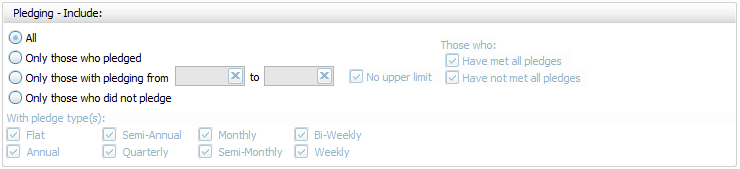
Pledging — Include
Choose the option that best describes the Pledging information you wish to see on your report:
Specifies that only certain accounts should be included.
To specify certain Membership characteristics of the people you want to include. The characteristics for you to choose are actual fields that store people's information in The People File. This tab is the exact same as the People Selection Criteria in Membership Reports / Directory / Exports.
Determines the order and the appearance of the columns displayed.
Organizes the information into the desired order (and groupings).
Sets the style and size of the typeface used to display the contents of the report.
Place a
checkmark to select which, if any, Family Categories indicators you want to include (e.g. [V] for Visitor, [D] for Donor, etc.)
Once you have made all of your selections, click Print to view a Print Preview and then proceed in sending the file to your printer. You can also Export most reports and/or Send via Email as a file to be used outside of Church Windows.