Print the Find Grid
In Church Windows Membership, from The People File, you can print reports and labels, create a custom report, create mail-merge files, and export data from The Find Grid. In working from the Grid, you can choose exactly which records or group of records you would like to print or export. You can print the information from all of the records on the Grid, or you may select only certain records to print.
You have two choices when printing from the Grid: Print Grid or Reports

Print Grid
Once you have built
The Find Grid so that it appears exactly they way you would like to see it on the printed page, you may easily print the Grid "as seen". In order to build the Grid as you would like to see it on the page:
- First, Using the Find Function, enter your criteria to get the desired people to appear on the Find Grid.
- Then, make sure to Group & Sort the Find Grid Records so that the people on the Grid are sorted in the order you would like them.
- Lastly, make sure to Organize the Find Grid Columns / Fields so that only the fields that you want to print appear on the Find Grid in the order you would like to see them on the report.
- Once the Find
Grid is ready to be printed "as seen", then click the
Print Grid button. The Find Grid Print Options screen will appear:
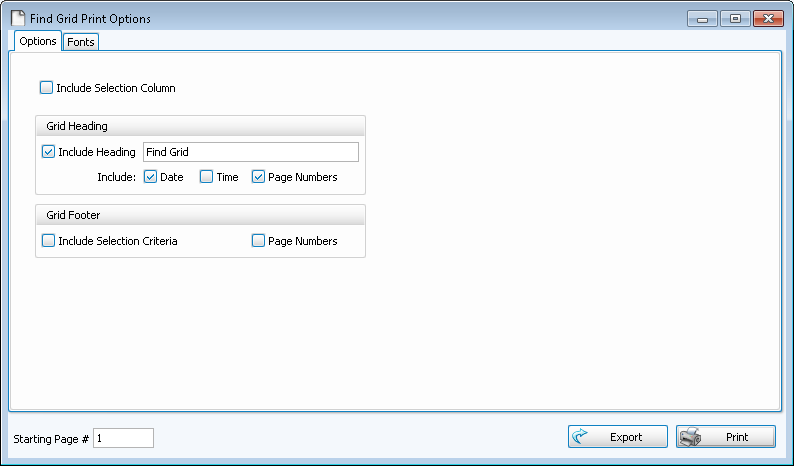
Include Selection Column
This refers to the column at the far left of The Find Grid where you check or uncheck the names of the people in the Find results. If you want to include this column when you print the Grid
check this box.
In the Grid Heading section, you may decide how you’d like headings to appear on this report.
- If you do want a heading on this report, then put a
- You may also choose to include the current time and date as well as page numbers in the report headings by
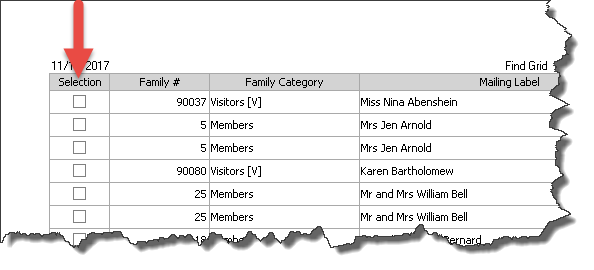
- This how the page header looks with all settings checked:
- If you would like the search query terms that you used for your Find to appear centered at the bottom of each page, place a
- If you want the pages numbered at the bottom, then
- This is how the page footer looks with both selections checked:
Change the size and style of the font that prints on the report by clicking the Fonts tab, choosing the Page Header, Column Headings, and/or Body Text settings, and applying your selections.
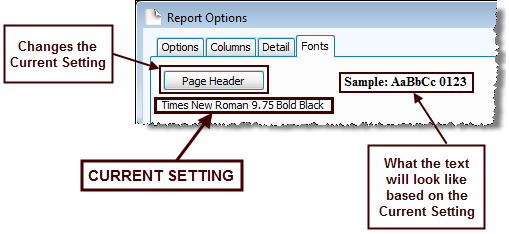
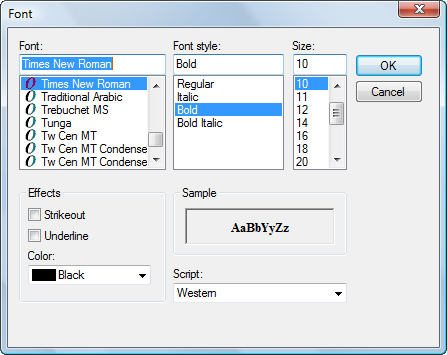
Choose the setting for the item you wish to change, and another screen will appear for you to change the font.
Change to the desired font settings and click OK. When you click OK, a sample set of text will show you how the report text will print due to the selections you made. Click Reset to Default to change all fonts to their original settings.


Reports
- When you click Reports, as elsewhere in the software, you can choose from three options:
- As you have already selected your people by Using the Find Function, the only selection to be made in Step 1 — Select who should appear on the report is the order in which to print the list determined on the Sort Tab . You can sort the report by up to three fields, just like other Reports / Directory / Exports options in Membership
- Step 2 — Select the report layout/format will be exactly the same as in those reports and exports.
- You can check or uncheck selected people from the list which will contain everyone who met the criteria you entered when Using the Find Function.
Once you have made all of your selections, click Print to view a Print Preview and then proceed in sending the file to your printer. You can also Export most reports and/or Send via Email as a file to be used outside of Church Windows.
