Enter Donations
The Enter Donations screen is where batches of donations are recorded and posted.
Enter Donations Fields collect information about donations for reports, statements, and accounting.
-
When: Donation Date and Posting Date
-
Who: Giver or Giving Unit
-
How: Amount, Payment Method, Giving Distribution
-
What: General and Designated Giving, Pledges, Batches
-
Why: Comments
Access Enter Donations
To access from the Button Bar, go to Donations > Enter Donations.

To access from the Home Screen, go to the Quick Access Button.

Enter Donations
 Locking Fields
Data entry fields that aren't in use can be turned off for a batch. Clicking the switch icon from green/up to red/down skips the field when using keyboard shortcuts like Enter and Tab.
-
Enter Donation Date and Batch
These fields apply to all the donations in this batch. Batch codes are optional but can help with giving organization.
-
Giver

In the Giver drop down, type the name or giver number of the donor. This search includes First, Middle, Last and Nicknames.
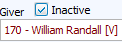
Include Inactive givers with this option selected. Inactive names appear in red. Add new givers during donation entry.
 View pledge and giving history.
 -
Enter Financial Information
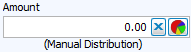
Enter the amount and payment method.
The Giving Distribution is indicated below the amount field. This can be changed by clicking
 .
. -
Check or Reference #

This only needs to be entered for checks, but since this can be included on statement, you could also use this area to indicate another reference number or indicate ACH transactions.
-
Comments

Donation comments can include any additional information. Some common uses might be donations in memory of, notes about a designation, or explanations of distribution; these can be included on statements or reports.
-
Account and Pledges

The donation needs to be assigned to one or more accounts. If the selected giver has a current pledge, that will also be indicated in the account drop-down.
-
Line Items

Comments about the specific account designation can be entered line by line and can be included on statements or reports.
Click
 to start over in the Account/Pledge section. Click
  to clear all information including giver and payment.
 -
Add to Batch
Click the
 button or press CTRL & + or END on your keyboard.
This add the donation to Unposted Batches. Use
 to pull a donation back to the editing area or
  to delete it from the batch.
Entries are summarized by Giver and by Account at the bottom of the screen.

Save, Post or Transfer a Batch
You have several options for your donations entries when you've reached a stopping point.
-
Save Batch to Resume Later
To save your batch without posting, click
 . This will save the donations in Unposted Batches where you can return to and edit or post.
 -
Post Batch
Clicking
 will record the batch to the Donations module. This attaches donations to giver records and are accessible from Browse Donations.
 -
Post & Transfer
This button
 completes posting the batch to donations and then opens the Transfer to Accounting dialog to transfer the donations income to the Accounting module.