Transaction Corrections and Reversals
Use the Browse Transactions screen to make reversals and corrections to your existing Transactions.
Note:
Reversals are used in place of deletions, this allows an iron-clad audit history to be maintained. Reversing a transaction is permanent; it is not possible to reverse a reversal.
Click the Browse button under the Transactions menu to open the screen:
![]()
Then, click to select the transaction you wish to reverse or correct, and proceed with the steps of one of the following options:
 Correct the Transaction
- Click the Correct button.
- The screen will display the currently recorded transaction information.
- Enter and/or replace any information you wish to correct with the information you have determined is correct.
- When you are finished, click the Save Correction button.
- If your correction consists of a change to an amount, a date, or an account, a message will display a new transaction number. The new transaction will then be shown with the corrections you made in the Browse Transactions list with the new transaction number.
- The transaction you originally selected for correction will be reversed.
Note:
If you are correcting a Donations transaction, you will get an initial screen asking if you want to change the comment on the transaction (in which case it will not need to be reversed) or correct the accounts used. If the accounts need corrected, it will be reversed and re-entered for you, and it will tell you the new transaction number. 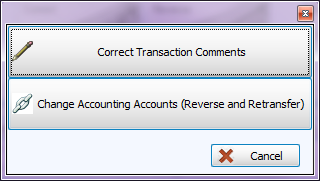
Reverse the Transaction
Click on the Reverse button at the top and you will get the reversal screen:

- Choose a date that represents the way you would like the Date Occurred to show on the reversal transaction you are about to make.
- Date occurred from original transaction:
The reversal transaction will contain the same Date Occurred as the transaction you have chosen to reverse. this is the recommended date to use when reversing. To pick a different date, click on the Advanced Options tab and you will be able to select a different date, either today’s date or any other date for the year.
- Date occurred from original transaction:
In order to preserve the original occurrence of all transactions, no originally posted transactions will be completely erased during this process. Any transaction reversals can be found by placing a  checkmark in the Include Reversed Transactions box, and looking up the original transaction number. All reversed transactions will show in red text. Otherwise, the reversed transactions will be hidden when viewing the Browse Transactions list.
Note:
Reversals are used in place of deletions, this allows an iron-clad audit history to be maintained. Reversing a transaction is permanent; it is not possible to reverse a reversal.
Changing Payments or Collections
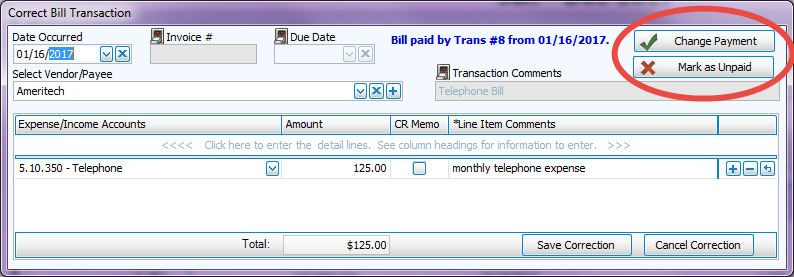
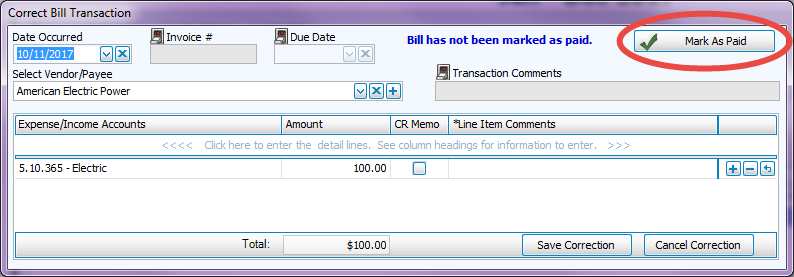
When correcting an Invoice Accounts Receivable transaction (ARIN) or an entered Enter Bills transaction (BILL) that has already been paid, you will be given an option to mark it as unpaid, change the payment or the collection information on the transaction you are correcting. If the a bill has not been paid you will the option to mark it as paid and then match it with its payment transaction.
- Select the transaction and click the Correct button.
- On the screen that appears, choose the line containing the changes you wish to make and click the OK button.
- If needed, click either Change Payment or Mark as Unpaid:
- To mark unpaid bills as paid from the Correct screen, click the button and following the prompts:
- Verify all your desired changes have been applied to the transaction and click Save Correction to apply the transaction correction.
