Transfer Donations to Accounting
Once you have posted a batch of donations using Enter Donations, you can transfer the information from the Church Windows Donations Module to the Accounting Module. To be able to do so, you must have a Chart of Accounts set up in the Accounting Module. Then, you must Link Donations to Accounting so that your Donations accounts are matched up with the corresponding Accounting Module Chart of Accounts.
To access the Transfer Donations to Accounting screen:
- From The Initial Portal of Church Windows choose either:
- Donations
- Then click Donations in the Button Bar
- Click the Transfer to Accounting button
- Accounting
- Then click Transactions in the Button Bar
- Click the Transfer to Accounting button
- The Transfer Donations to Accounting screen will appear:
- The tabs in this screen allow you to perform the following tasks:
 Transfer Donations
When a batch of donations is posted, you can then transfer the batch from Donations to Accounting. To access the Transfer Donations tab that contains the options necessary to transfer the batch, you can click the Post & Transfer button on the Enter Donations screen. Otherwise, click the Transfer to Accounting button from the series of buttons found above in the Donations or Accounting menus.
Locate the batch that you want to transfer to Accounting. You can rearrange the order of the items being displayed by clicking any of the columns.
- Date Occurred: The date on which the batch was posted.
- Batch Code: Displays the batch code used at the time the batch was posted, if used.
- Total Amount: The amount of all the donations entered into the batch.
Each line represents a batch that has been entered and posted in the Donations Module, but not yet transferred to Accounting. Click the
 expand button to the left of each row to view details (when expanded it will become a
  collapse button).
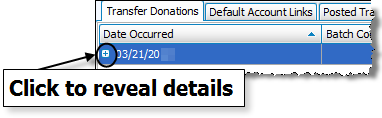
In the revealed batch details you can only change the accounts shown in the Debited Account and Credited Account columns. If you need to make changes, click the Debited Account or Credited Account box you wish to change and select the desired account.
If you wish to currently refrain from transferring the batch to Accounting, you can click to check the Do Not Transfer box on the line that represents your batch. The line that contains the information about the batch will disappear only from view.
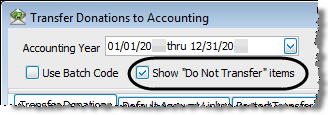
Place a checkmark in the Show “Do Not Transfer” Items box to bring any such items back into view at any given time. Once this box is checked, any items that have not yet been transferred will reappear unless they have been already transferred.When you are ready to transfer the batch to the Accounting Module, click Post. The Confirm DONA screen shows a line for each account in the Accounting Module and the corresponding Debit Amount / Credit Amount that will be affected after you confirm the Donations transfer. Type any Comments you wish to add next to each line and/or for the whole batch. Confirm the Donations transfer to Accounting by clicking the Post button at the bottom of the screen.
A message will display the transaction number(s) created by the successful transfer of the Donations batch to the Accounting Module. Use the transaction number(s) in the message to locate the transaction(s) in the Browse Transactions screen of the Accounting Module, where each transaction involved in the batch you transferred will be kept track of as a DONA transaction. Click OK to clear the message.
The batch you posted in the Transfer Donations list will disappear. Click the Posted Transfers tab to locate the batch you just posted and print if necessary.
Print Selected Transfer(s)
If you wish to print the information about the batch you wish to transfer, click the line that describes the batch and select the Print Selected Transfer button at the bottom of the screen to customize the Transfer Report Options. Once you have made all of your selections, click Print to view a Print Preview and then proceed in sending the file to your printer. You can also Export most reports and/or Send via Email as a file to be used outside of Church Windows.
Default Account LinksIf you are using the Accounting Module along with Donations, use the Default Account Links tab in the Transfer Donations to Accounting screen to Link Donations to Accounting. Here you can set up, correct, or remove the links between giving accounts in Donations to the accounts stored in the Chart of Accounts of the Accounting Module.
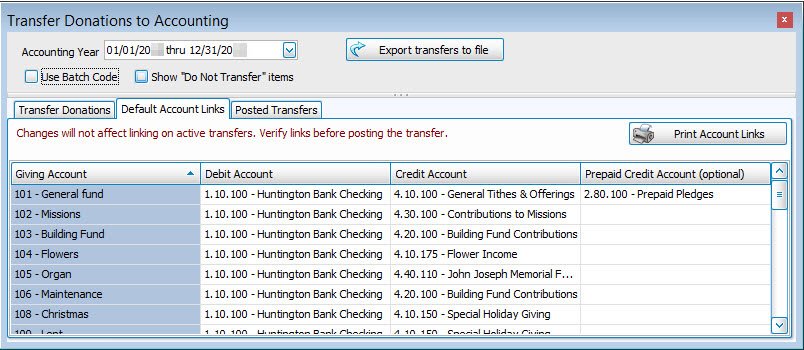
When the screen appears, on the Default Account Links tab, use the following columns to make the necessary adjustments.
To print or export a report that shows the current settings of the links, click the Print Account Links button.
Posted TransfersAfter a batch has been posted to Accounting, you can view it using the Posted Transfers tab in the Transfer to Accounting screen. Select the Date Range for the posted batch you seek to find. Then use any of the following columns to locate the specific batch and its entries.
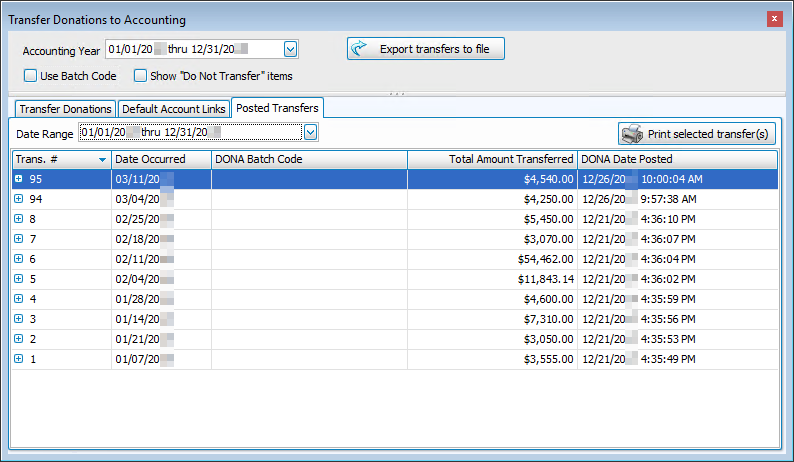
- Trans #: The transaction number given to the Donations batch item(s) at the time of posting.
- Date Occurred: The date that the batch was manually set to represent.
- DONA Batch Code: The batch code posted with the Donations batch, if applied.
- Total Amount Transferred: The sum of all batch item dollar amounts.
- DONA Date Posted: The date on which the batch was posted to Accounting.
Click the
expand button to the left of each row to view details (when expanded it will become a collapse button). Each set of details shows the Batch Code, Amount, Giving Account, Debit Account, Credit Account, and Giving Posted for each item in the posted batch. Click the collapse button to collapse the details.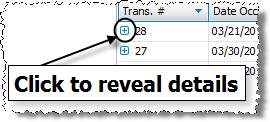
Print Selected Transfer(s)
To print posted transfers, click the Posted Transfers tab to view the list of batches already posted to Accounting.
If you wish to print a batch in the list, click it once to select it. If you wish to select more than one line, hold down the CTRL key on the keyboard, and click the next desired line. Then click the Print Selected Transfer(s) button and the Transfer Report Options screen will appear. Use the tabs and options available to format the information as needed.
Once you have made all of your selections, click Print to view a Print Preview and then proceed in sending the file to your printer. You can also Export most reports and/or Send via Email as a file to be used outside of Church Windows.
OR
![]()
