Enter Donations
Use the Enter Donations screen to enter the money that Givers donate to your Church and its purposes / campaigns into the software. Through the Enter Donations screen, gather the donations into a batch and post the batch. The software will then update the donation records for the Givers with the information you entered.
To access the Enter Donations screen:
- From The Initial Portal of Church Windows choose Donations then either:
- Click the Enter Donations button in the in the middle of the screen:

- Click the Enter Donations button in the in the middle of the screen:
- Click Donations
in the Button Bar at the top of the screen:
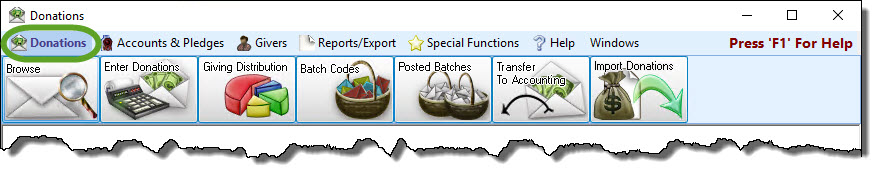
- Then, from the menu options that appear underneath, click
Enter Donations:

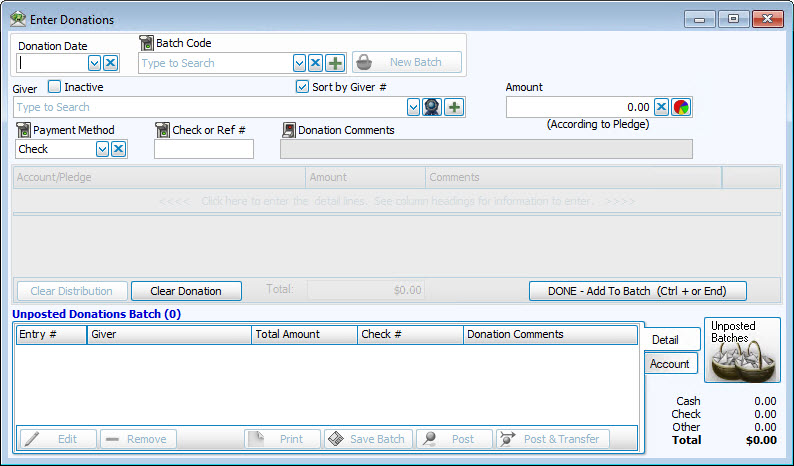
- This will open the
Enter Donations screen:
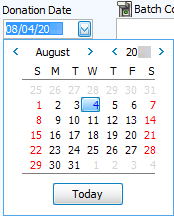
- Donation Date
Click the dropdown button and select the date on which the donations were collected:
- Batch Codes
If you have a Batch Code that you would like to apply to the donation(s), click the dropdown box and select it from the list:

Notes:
If you do not see a Batch Code in the list, click the Add button to add a new Batch Code. Adding new
Batch Codes will then allow you to apply the Batch Code to the current batch. Also, this new Batch Code would be available for you to apply to any future batches that would need it. Additionally, this is one of the Locking Fields, meaning that you can turn it off if you do not want to fill it out.
Add button to add a new Batch Code. Adding new
Batch Codes will then allow you to apply the Batch Code to the current batch. Also, this new Batch Code would be available for you to apply to any future batches that would need it. Additionally, this is one of the Locking Fields, meaning that you can turn it off if you do not want to fill it out. - Giver
Click the dropdown button of the box or starting typing and choose the name of the person giving money:


 Pledge / Giving button
If you wish to see a short log of what the selected Giver has already donated and pledged, click the
pledge / giving button and a window will appear. Close this window when finished viewing.
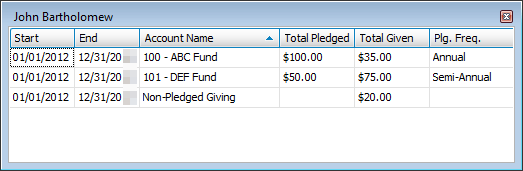
- Start: The Start date of the pledge listed under Account Name.
- End: The End date of the pledged listed under Account Name.
- Account Name: The name of the Pledge.
- Total Pledged: The total amount of money pledged for the duration of the pledge.
- Total Given: The total amount of money given towards the pledge, during this time frame.
- Plg. Freq.: The frequency at which a portion of the Total Pledged money.
Note on Plg. Freq.: In the image above, the Total Pledged for the DEF Fund is listed at $50.00. The Plg. Freq. shows Semi-Annual. This means that the Amount Per Frequency for this person to the DEF Fund is $25.00 every 6 months (Semi-Annual), as recorded in the Enter Pledges procedure.
Note:
If you do not find the name of the Giver in the box, it is possible that the Giver is inactive or was never added as a Giver. Be sure to verify that the Giver is not listed as Inactive first, so that you do not add a duplicate entry for a Giver that might already exist. First, place a checkmark in the Show Inactive box and search for the name once again. Then, after you have determined that a record for the Giver must be added, click the Add button to
Add Givers.
in the Show Inactive box and search for the name once again. Then, after you have determined that a record for the Giver must be added, click the Add button to
Add Givers.
- Amount
Enter the entire amount donated by the Giver.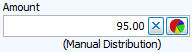
- Giving Distribution
Take a look at the item in parenthesis below the amount you entered.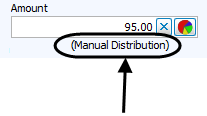
The item within the parenthesis, called Giving Distribution, represents how the money entered in the Amount box will be distributed among the funds towards which the Giver is donating. The item in parenthesis might be a name that someone at your Church has entered into Donations. Otherwise, the item will either say "According To Pledge" or "Manual Distribution."Note:
The amount that goes in this box is the total of all that the Giver donates for all the purposes put together for the specified date. In other words, a Giver might have donated $45 for General Giving and $50 for the Building Fund. In this box, you would enter $95. How that is separated is handled by the Giving Distribution.
If you need to change the way the money is being distributed, click the pie chart button to open the Giving Distribution screen:
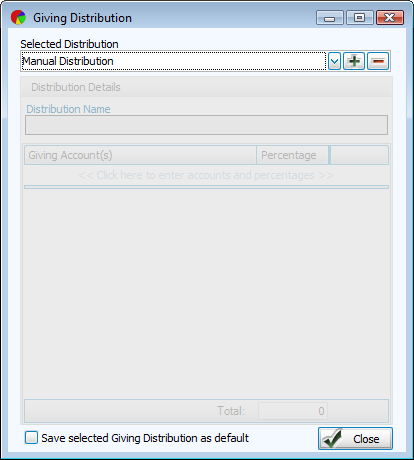
For example, if your Church has a way of making a specific Giving Distribution to separate accounts by percentage of the total amount that the Giver donates, you can apply that distribution on this screen.
- Payment Method
Click the dropdown button and choose one of the following payment methods:

- Check or Ref #
This field allows you to enter a number, if needed for the donation. This is one of the Locking Fields, meaning that you can turn it off if you do not want to fill it out.For example, cash donations would not need these numbers, so the field could be turned off while entering cash donations and turned on for checks.
- Donation Comments
In the box, enter any optional information that describes this donation. This is also one of the Locking Fields. - Account / Pledge
Click the dropdown button of the box and make the desired selection:

If you need to Add an Account, click the button and enter the new Giving account information into the Add Giving Account screen.
If the gift should be credited towards a pledge, be sure that the correct Pledge Range dates are showing next to the account name, or the word Current for this year's pledges.Note:
Also, if you would like to see certain accounts show up towards the top of the list that appears when clicking the dropdown button, click the
  button. You can reorder the way the accounts appear in the list from the Order Giving Accounts screen that appears.
 - Amount
Once you make an Account selection, the dollar amount entered in the first Amount box in Step 7 will appear in the Amount box next to your selection. If needed, change the amount of money that the Giver is donating to the selected Account in the Amount box. - Detail Comments
In the box, enter any optional additional information that further describes this specific portion of the donation: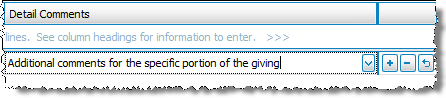
- If you would like to add multiple entries that altogether make up the details of the one transaction that you are currently entering, press the
 Add button and repeat Steps 12 through 14 until you are finished completing the details of the transaction. Otherwise, you may proceed to the next step.
If you would like to remove any line from the details of the transaction press the delete button. If by chance you press the Delete button in error, and would like to bring the line back to where it was, press the
  Undo button.
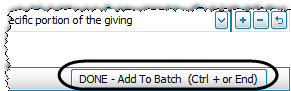
- When you have added all of the details for the specific Giver's donation, click the Done — Add To Batch (CTRL + or End) button (or hit either the CTRL and + keys, or the End key on the keyboard):
- If the amount you entered in the Amount box does not match the total amount of all giving portions combined, you will get the following message:
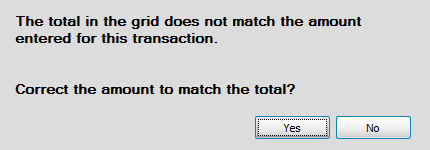
As depicted in the following image, the Amount does not match the Total (in the grid):
Note:
Sometimes the Total is more than the Amount, or vice versa. It depends on the information from which you are entering the giving details. If you find that there is a discrepancy in the two dollar amounts, you must discuss it with whoever has given you the information so that you can enter the information correctly.
If you press Yes to the message, the Amount will be changed to the Total (in the grid). Otherwise, press No to manually correct any portion before adding it to the Unposted Donations Batch. - Unposted Donations Batch
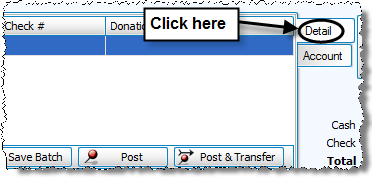
When the transaction is successfully added to the batch it will appear in the list at the bottom of the screen. - If you are more comfortable viewing the items in the Unposted Donations Batch section of the screen grouped by the account / fund to which they are being donated instead of grouped by Giver, you can click the Account tab on the right side of the Unposted
Donations Batch window.
OR
Note:
The Enter
Donations screen provides you with the option of
Locking Fields to make a selection from a field and lock it in place or skip a field you do not use. You might find this most useful if you use the ENTER and TAB keys to move from one field to the next. To enable this feature, you must make a desired selection from the field and click the  ON light switch to lock it in place, indicated by the
  OFF light switch. When you lock the field in place, pressing the ENTER or TAB key will advance to the field after the field that has been locked.
Repeat the steps above for each donation you need to enter until you have finished creating the batch of donation transactions. When you are finished, you have the following options available to you:

To make adjustments to any transactions in the Unposted Donations Batch area of the screen, first click on any one transaction that contains details that you would like to adjust. Then click Edit to make the changes. The transaction will move to the top half of the screen for you to adjust. When finished, click the Done — Add To Batch (CTRL + or End) button (or hit either the CTRL and + keys, or the End key on the keyboard) to finish editing the transaction.

To remove any transactions form the Unposted Donations Batch area of the screen, first click on the transaction. Then, press Remove.
Note:
The Edit and Remove buttons are only available when the Detail tab is pressed. They will not show when the Account tab is pressed.

If you would like, you can print a batch report (which has the same format as the Donations Log Report) before saving or posting it. Click Print to view a Print Preview and then proceed in sending the file to your printer. You can also Export the report and/or Send via Email as a file to be used outside of Church Windows.

If you would like to save the batch so that you can come back to it at a later time, press Save Batch. This will store the donations in Unposted Batches until you are ready to finish and post the batch.

If you would like to post the batch, press Post. The donations that you have entered will be recorded as donations that have been entered and will appear in Browse Donations.

If you would like to Transfer Donations to Accounting after you finish posting the batch in the Donations Module, click Post & Transfer.
Note:
A message might appear on the screen to warn you if the day on which you are posting the batch does not fall on the standard posting day:
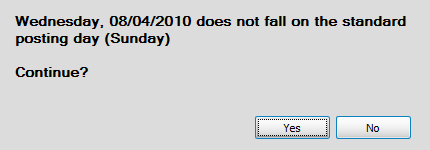
If you are determined to still post the batch, the software will let you do so. Click Yes to post the batch, or No to choose another posting date. If you would like to make adjustments to the standard posting day, go to
Donations Settings.
