Chart of Accounts Wizard
When the software does not yet contain a
Chart of Accounts for any fiscal year, the
Accounting module will automatically guide you through setting them up with the following series of steps:
- Step 1: Set the Accounting Year — Choose a calendar or fiscal year setup.
- Step 2: Decide on Account Number Structure — If using numbers, set a numerical structure.
- Step 3: Enter Funds and Income & Expense Accounts — Set up funds and associated accounts
- Step 4: Enter Assets, Liabilities, Vendors, and Payees — Enter the rest of the Chart of Accounts.
- After Using the Setup Wizard — Final topics and features to understand before getting started with the Accounting module
The first step is to define the Accounting Year, or fiscal year, by entering the month on which it begins in the current year. The Chart of Accounts, the Budgets and Budget Projection amounts, and the Transactions you save and post to the accounts are kept track of in an Accounting Year that must be set up and managed from one year to the next.
Anytime during your currently active Accounting Year, you can set up the new Accounting Year and begin working in it long before the current year is finished. You can then move back and forth between the years, continuing to record transactions in the current year while working to get the next year ready. This can also be changed later, if needed, using Manage Years.
- Review the Starting Month / Year to make sure that it matches the fiscal year applicable to your church.
- To change the current setting of the Month, click the dropdown button next to the box that reads "January", and click the desired month from the list that appears.
- Also, you can adjust the Year by removing the year currently showing and typing the desired year.
- Click the Set Accounting Year button to apply your settings.
- A message will prompt you that "This will create an
Accounting Year starting [on the first day of the chosen Month and Year] and ending [on the last day of the one-year period]." The message will also ask you "Is this correct?"
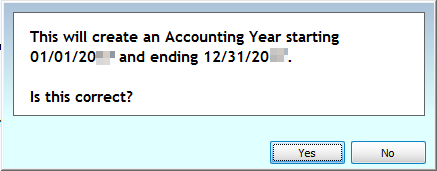
- Click Yes or No to answer the question:
- By clicking No, you will be given the option to choose a different month and year before proceeding.
- Clicking Yes will take you to the next step — Chart of Accounts Wizard.
You have a choice to include Account Numbers in your Chart of Accounts structure, or organize Chart of Accounts in alphabetical order (this can be changed later, if needed, using Change Account Number Structure). After you complete Chart of Accounts Wizard, a message will prompt you with the question "Will you be using account numbers for your Accounts?"
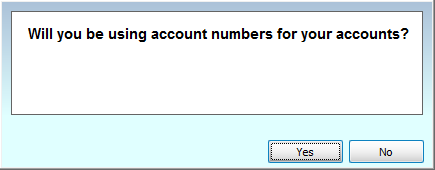
In this step, apply your decision of either using numbers in your Chart of Accounts, or not, by clicking Yes or No.
To decide on whether or not to use numbers in your Chart of Accounts, examine your personal list of accounts to be added to the Chart of Accounts in the software.
- If, for example, you find that your Chart of Accounts is very small and straightforward, you might not need numbers.
- On the other hand, you might find that having Account Numbers will help make more straightforward a seemingly more complex Chart of Accounts structure.
Church Windowsis set up to accommodate the use of account numbers for any
church that uses a numbering system to organize the list of accounts, labeled in the software as the Chart of Accounts. If you choose to use account numbers, the Chart of Accounts will be organized in numerical order. Otherwise, the Chart of Accounts will be organized in alphabetical order by account name when you finish the setup wizard.
If you choose Yes, you will be brought to a screen to specify the structure of the account numbers you wish to use in the Chart of Accounts.

- Type any combination of '#' (pound signs) for your account number placeholders and '.' (decimal points) for any separators you wish your account numbers to have.
- The account number can have from 3 to 12 placeholders and up to 5 separators.
- When you are finished typing your desired account number structure, click the Use this Structure button.
- If you click No, you will not be asked to enter any information regarding an account number structure. Instead, you will be brought to the Setup Chart of Accounts screen to begin Setting up Main Funds.
Once you have made your numbering decisions, proceed to the next step — Chart of Accounts Wizard
After completing
Chart of Accounts Wizard, this portion of the Wizard will provide you with the means to enter the list of
Funds for your
Chart of Accounts. Each Fund can contain at least one
Income and/or at least one
Expense account. If you choose to set up a Sub Fund for any Main Fund in the list, the Wizard will then allow you to add at least one Income account and/or at least one Expense account to each Sub Fund.
Setting up Main Funds
Using the image below as a guide for setting up your funds:
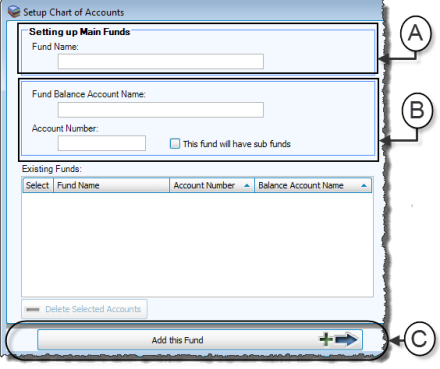
- Enter the Fund Name
- Enter the Fund Balance Account Name and Account Number for each fund.
Click to mark the checkbox if This fund will have sub funds, if not leave it empty. - Then, click the Add this Fund button.
The information in the top portion of the screen (indicated with an (A) in the image above) will change according to whether you are setting up a Main Fund, Sub Funds,
Income accounts, or
Expense Accounts. While the top portion of the screen will indicate the specific location in the
Chart of Accounts where you are adding the account or fund, the rest of the screen will ask for similar types of information (a name, possibly a number, and a checkbox to allow for
Sub-Accounts or funds).
Setting Up a Sub Fund
If you have checked the box labeled "This fund will have sub funds", you will be taken to a screen to begin Setting up Sub Funds for your Fund.
- Enter the Sub Fund Name, Sub Fund Balance Name, and Account Number (if applicable).
- Then click the Add Sub Fund button at the bottom of the screen.
- After you click Add this Fund (or Add Sub Fund, if adding a Sub Fund) at the bottom of the screen, you will be asked, "Will there be Income accounts for [the name of the fund or sub fund]?"
- Click Yes or No to answer the question.
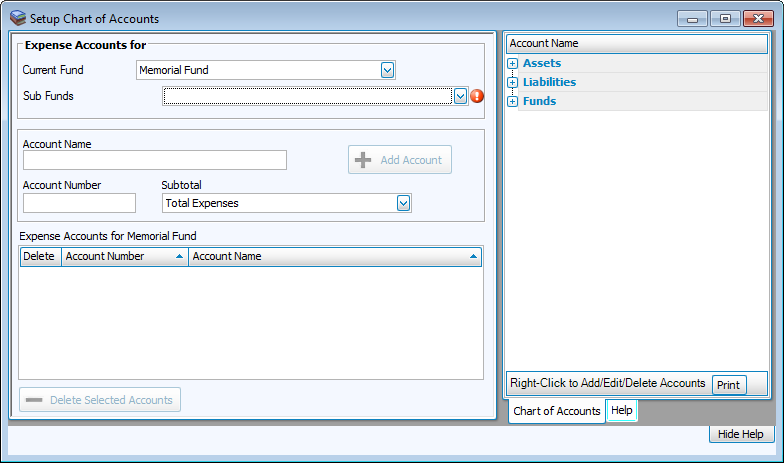
Adding Income Accounts
- If you click Yes, enter the Account Name and Account Number for the Income account and click the + Add Account button.
- Sub-Accounts
- If the account is part of a main fund (and not a sub fund), you will be able to add sub-accounts by placing a check in the box that says "This account will have Sub-Accounts" before hitting the Add Account button.
- Repeat for each Income account of the fund or sub fund you are currently setting up.
- When finished, click the Finished with Income Accounts [for the fund or sub fund] button at the bottom of the screen.
- You will then be asked "Will there be Expense accounts..."
- Click Yes or No to answer the question.

Adding Expense Accounts
- If you answer Yes, proceed in adding your expense accounts in the same manner as you entered the income accounts.
- Sub-Accounts
- If the account is part of a main fund (and not a sub fund), you will be able to add sub-accounts by placing a check in the box that says "This account will have Sub-Accounts" before hitting the Add Account button.
- When finished adding your Expense accounts, click the button to confirm doing so at the bottom of your screen.
- You will then be asked if you would like to set up another Fund or sub fund. Click Yes to repeat the process of adding the necessary accounts for each fund.
When finally finished with all of your funds and their respective income and expense accounts, click No to answer the question "Would you like to setup another fund?" and proceed to the next step in the Wizard —
Chart of Accounts Wizard
After completing
Chart of Accounts Wizard, the next screens in the Wizard will guide you through first, building your list of
Assets, then Accounts Payable Vendor / Payee names, and lastly the
Liabilities. If you have activated the Licensing key to use the
Accounts Receivable portion of the software, you will be brought to a screen to set up the list of Clients beforehand.
Assets and Liabilities
- The Accounts Payable
Vendor / Payee list resides as a ledger in the list of Liability accounts. If you have activated the license to use Accounts Receivable, it will reside as a ledger among the Asset accounts.
- Enter the Account Name and Account Number (if applicable) for each account you wish to add to the list.
- If applicable, establish that "This account will have Sub-Accounts" by placing a check in the box.
- Click the Add Account button to proceed. Keep adding your accounts until you have finished.
- Then click Finished with [the type of account or Sub-Account you have added]. Continue to Chart of Accounts Wizard for the next steps.
Vendors, Payees, and Clients
- If you have chosen to use Account Numbers in your Chart of Accounts, the Accounts Payable list of Vendors and Payees requires you to enter one Account Number to represent the entire list.
- The same is true for the Accounts Receivable list.
- Choose an account number for each portion and click the Set Account Number button to proceed. (You can always
Change Account Number Structure later if you need to.)
- Set up your list of Payees (and Clients, if applicable) by entering the Account Name or selecting Choose from Membership to add someone from People Records and clicking the Add Account.
- If you need to enter the address and other information for the Vendor (or Client, if applicable), click the name you added to the list.
- Then, click the Vendors (or Client) tab to reveal the screen where you can add any additional information.
- When you are finished setting up your list, click the Finished with [the type of accounts] button at the bottom of the screen and proceed to the final screen in the Wizard.
Chart of Accounts Wizard, use Chart of Accounts Menu to review your new Chart of Accounts and explore Church Windows Accounting.
Once you have finished the
Chart of Accounts Wizard, the
Accounting module will enable full functionality to the active software menus. You then have the choice to click the Manage Accounts button and make any additional adjustments to your
Chart of Accounts that were not made during the Setup Wizard. Below is a list of features to review and understand after using the Wizard.
Beginning Balances
Each Asset, Liability, and Fund Balance account has a balance that represents the value of the account at the beginning of the
Accounting Year, called the
Beginning Balances. After using the setup wizard to set up your accounts, the Beginning Balances will not yet be set. You can enter the Beginning Balances into the software and save your changes at any time. You have until the end of the
Accounting Year to assess the accurate Beginning Balances. When you are ready to make a final commitment to the Beginning Balances for the
Accounting Year, you should
Finalize Beginning Balances. Doing so will allow you to set up a new
Accounting Year as time moves forward from one year to the next.
Budgets
Use the
Budgets and Budget Projection features in
Accounting if your
church sets forth plans to spend and gain certain amounts of money each year for its funds. The Budgets feature will display all the
Income and
Expense accounts you have added to the
Chart of Accounts, each with a setting for you to enter Monthly, Quarterly, or Annual budget amounts.
Reports
When you run
Reports in
Accounting, you have the choice to print it onto paper,
Exports it to a file that is viewable on a computer outside of the
Church Windows software, or
Send via Email to someone. All the reports that can be run in the software are found under the Reports / Export menu in the
Button Bar. The Reports menu also includes features to record payments then
Print Checks and create
Tax Forms to give to the Accounts Payable Vendors / Payees listed in your
Chart of Accounts. Either one report can be run at one time, or
Multiple Reports can be set to run one at a time in a customizable sequence.
If you have activated the System Information key to use the
Accounts Receivable portion of
Accounting, you can use the Reports menu to
Accounts Receivable Invoices and
Accounts Receivable Statements for each
Client.
Subtotals
Each
Accounting report that has a total line will show one or more of the following: Total Assets, Total Liabilities, Total Fund Balances, Total Income, and Total Expenses. Within these total lines, you can set up
Subtotals and add sets of accounts. If a report is set to show the subtotal line, the subtotal line will show the total balance for the set of accounts.
Bank Reconciliation
Each month, more or less, your bank(s) will issue you a statement to show you the activity for the accounts your
church has opened with them. Use the
Bank Reconciliation feature in
Accounting to update and compare your financial records with the bank's confirmation of those transactions actually having cleared. The Bank Reconciliation gives you the opportunity to also account for the Charges and Interests that the bank account has incurred, as well as verify the Deposits and Withdrawals that have been made. The Bank Reconciliation can be saved multiple times until you are ready to bring closure to, or finalize, the Bank Reconciliation.
Prior System Checks
On the date you decide to start using the
Accounting module, you might have outstanding checks that you have not yet accounted for as having cleared the bank. While you wait to receive a statement to verify that the checks have cleared, be sure to enter the information for these types of checks on the
Prior System Checks screen. When you receive the bank statement, run the
Bank Reconciliation for the corresponding Asset and mark the checks listed on the statement as "Cleared" in
Accounting.
Accounting Year Management
Each
Chart of Accounts and the transactions applicable to it are kept track of in distinct fiscal years, called
Accounting Years, in the
Accounting module . While you are working in the current
Accounting Year, the
Manage Years feature found under the
Special Functions menu gives you the option to set up a new
Accounting Year, update its
Beginning Balances, set up its Chart of Accounts, and update its
Budgets amounts. Other features include switching between
Accounting Years to view the
Transaction Journal and
Reports, and even implementing any changes your
church might be making to its fiscal year duration.
Link Donations to Accounting
If you plan to use the Accounting module to keep track of Giving entered in the Donations module , the next step is to link the Donations Giving Accounts to the accounts in the Accounting module . After you are finished with the Chart of Accounts Wizard, you can Link Donations to Accounting on the Default Account Links tab of the Links to Accounting screen.
By having accurately established the above items, you can post Transactions to your accounts and generate Reports that accurately reflect the financial progress of your church. The Accounting Settings that are found in these features can be changed throughout the Accounting Year unless a setting in the specific feature has been finalized.