Re-size & Re-position Screens
Many of the screens in Church Windows can be re-sized and re-positioned to your preference. For example, you can re-size and move any screen open and you are able to see the windows side by side or cascading. You can only have certain windows open at any one time within those Modules so there are ways to view or close all windows quickly and easily. Each Church Windows Module also includes a setting to return all of the screens in that Module to the original sizes and positions.
 Re-size a screen
- You can click the Maximize / Minimize button in the upper right.
- If you prefer to manually set the size of a screen, do the following:
- Hover the mouse on one of the edge lines; a double-headed arrow will appear.
- Holding the left mouse button down, drag the edge line to the right or left to increase or decrease the size of the screen.
- Continue with the other three sides of the screen until you have it at the desired size.
Re-position a screen
- Click the blue bar at the top of the screen.
- Holding the left mouse button down, drag the screen to the desired position on the screen.
- When you open the screen(s) again, it will appear in the size and position you set.
Restore screens to their original size and position
- Either:
- Go to Special Functions and click on Settings for the Module in which you want to reset the screens.
- Click the button to "Reset all screens to default size and location" in the settings screen (either on the bottom or on the right side of the screen). This will only affect the screens within that Module.
- Click the Windows button at the top of the screen and choose "Restore Default Sizes/Positions" from the dropdown list.
OR
- A popup may open asking you to confirm the changes to the screens within that Module: Click Yes to continue, No to cancel the changes.
Help and Windows
The final two options in the Button Bar across the top of the screen are Help and Windows.
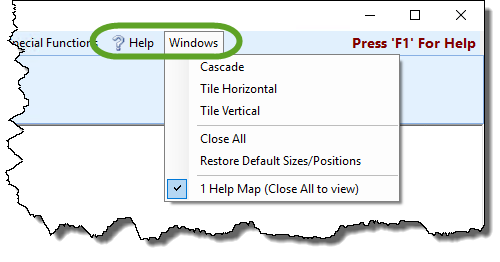
? Help is a quick link to bring you to these help files. You can also always press F1 on your keyboard to go to the specific area of these help files relevant to the screen where you pressed the F1 key.
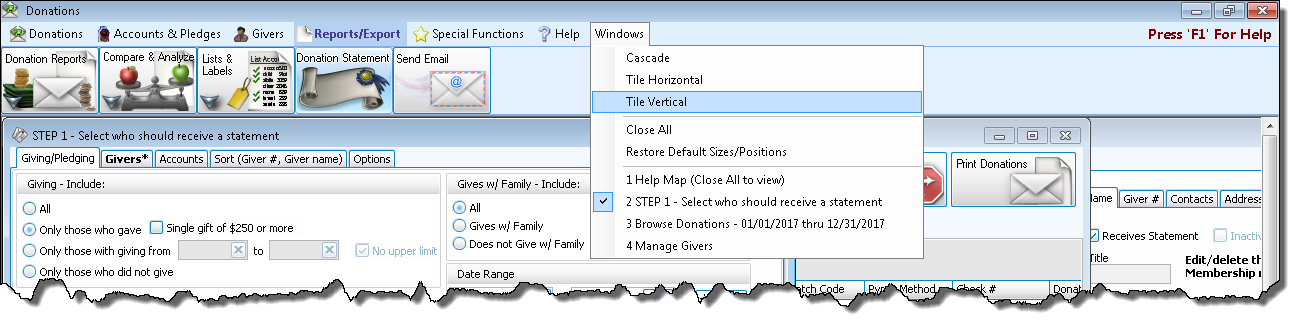
The Windows dropdown menu is divided into three sections which allow you to adjust how your windows or screens appear in the current Module. These options are quite handy when multitasking with various functions in the software.
- The first section provides three choices for arranging the current set of open windows:
- Cascade
Displays the windows in a staggered formation, starting in the top left corner and continuing down and to the right in small increments: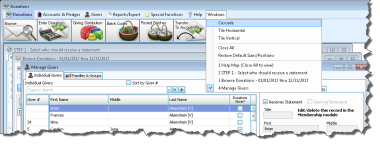
- Tile Horizontal
Displays the windows stretched horizontally, stacked top to bottom: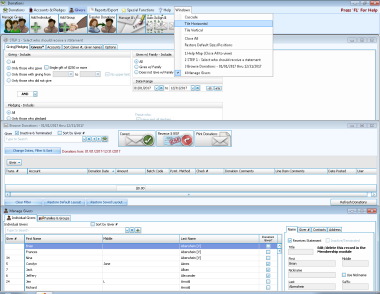
- Tile Vertical
Displays the windows stretched vertically, arranged side-by-side: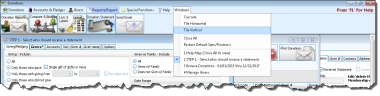
- The middle section in this menu includes two functions:
- Close All — This will close all open windows in the current Module (useful for functions that require you to close all other windows).
- Restore Default Sizes/Positions — This choice will Restore screens to their original size and position
- The bottom section contains a list of each of the windows that are currently open. Clicking on one of them will bring that window to view in front of the other open windows.


Note:
When you choose any function in any
Module, if the window does not open, has completely disappeared, or if any of the buttons on the screen are no longer visible (e.g. Next, Print, etc.), resetting the screen sizes and positions will almost always fix the issue. This may occur more frequently for web / cloud based and networked users, because different users with different computer monitors will each re-arrange the screens to fit their monitor.
