Enter Pledges
When an individual or group has pledged to donate money for purposes and campaigns at your Church, use these instructions to add the pledging information on the View and Enter Pledges screen.
To access the Enter Pledges screen:
- From The Initial Portal of Church Windows choose Donations
- Click Accounts & Pledges in the Button Bar at the top of the screen
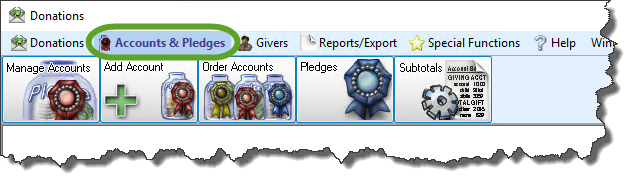
- From the menu options that appear underneath, click Pledges to enter the screen.

- If using the Campaign Pledges tab:
- Choose the Campaign or Add a New Campaign.
- Click the Find Pledges button if you have previously added pledges for individual or group Givers that are related to, or should be included in, the selected Campaign.

- If using the Pledges by Giver tab:
- The Show boxes give you the option to show or hide past, present, and/or future pledges listed on the record of the chosen individual or group.
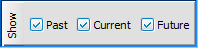
- If you would like the View and Enter Pledges screen to show only certain pledge information, remove the
 checkmark from the desired box.
 - Otherwise, leave the box with a checkmark inside it to include the contents that the box is meant to display.
- Click the Prior System Donations box if the individual or group Giver made a donation prior to when your Church started using the Donations Module.
- The Show boxes give you the option to show or hide past, present, and/or future pledges listed on the record of the chosen individual or group.
- Giver

Look up the name of the desired individual or group.- The name that appears in the box when first opening to the screen is the first record of all individuals and groups of people entered in the software.
- Start typing the name you are searching, or click the
 dropdown button.
 - You can also use the
 Previous and
  Next buttons to pull up a record for an individual or group that follows in sequence.
 - Placing a checkmark in the Sequence by Giver Number box, changes the sequence so that when you click the Previous and Next buttons, the names show up in order by Giver Number.
- In the larger portion of the View and Enter Pledges screen is a list of any pledges made by the selected individual or group or towards the selected campaign (depending which tab you are using).
Note:
When the total amount of money donated towards the pledge equals or exceeds the total amount pledged, a balloon icon appears next to the Total Given:
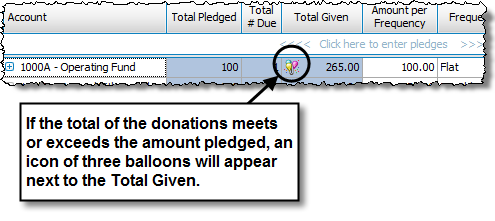
- To enter pledges, click the first available line that is labeled:
<<<< Click here to enter pledges >>>>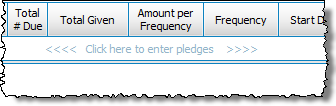
- The line will then be ready for you to enter the pledge information for the individual or group. Enter the information for the following six items:
Account
The name of the giving account. Click the
 dropdown button and select an account. If you have determined that you must Add an Account, click the
  Add button and add the new account.
Amount per Frequency
The dollar amount that the individual or group has declared to pledge at the frequency selected from the Frequency box. (NOT the total amount of the entire pledge.)
Frequency
How often the individual or group foresees giving the Church money. This selection determines the "Due-by Date" of each pledge. The choices are:
- Flat — due once on the first day of the campaign, use for one year pledges
- Annual — due once on the last day of each year of the campaign, use for multi-year pledges
Note:
Annual pledges will only show up on Donation Statements for the entire year, but not on partial year statements; try using Flat instead for a single year campaign. - Semi-Annual — due once every 6 months
- Quarterly — due at the end of each quarter
- Monthly — due once each month
- Semi-Monthly — due twice per month
- Bi-Weekly — due every other week
- Weekly — due each week
Note:
Check the "Week day for weekly pledges" in Donations Settings if you are seeing 53 weeks instead of 52 which happens during or after a leap year.Start Date
The beginning of the period in time that the individual or group is participating in the pledge to give towards the account selected in the Account box.
Note:
If you do not select a date from this box, the date on which the Pledge Campaign starts will appear by default.End Date
The end of the period in time that the individual or group is participating in the pledge to give towards the account selected in the Account box.
Note:
If you do not select a date from this box, the date on which the Pledge Campaign starts will appear by default.Use in Distrib?
Place a checkmark in this box if you would like to have the pledge be applied toward the Giving Distribution used when entering Donations on the Enter Donations screen.
Review the fields once finished to verify that the information you have entered is correct. - Then, notice that the rest of the fields will contain additional information about the pledge which is automatically calculated automatically:
Total Pledged
When you make a choice from the Frequency and Amount per Frequency boxes, the software takes the dollar amount listed in the Amount per Frequency box and multiplies it by the number listed in the Total # Due box.
Total # Due
The total number of donations the individual or group will contribute to reach their pledge, based on the Frequencyand the Start and End Dates of their pledge.
Total Given
The dollar amount that the individual or group has already given towards their Total Pledged.
If there is more pledge information to be added for the individual or group, press the  Add button and repeat for each Giver until you are finished.
If you would like to remove any lines from the pledge information you have added, press the  Delete button. If you would like to undo the change to the line, press the
  Undo button.
