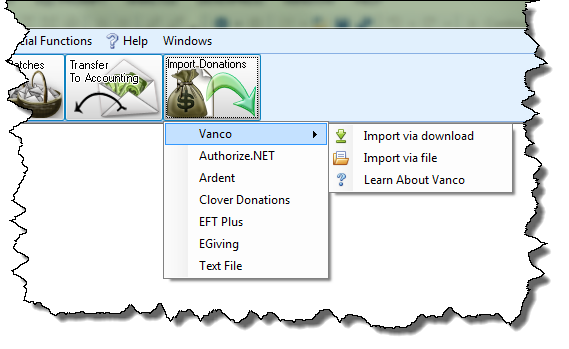
Import Donations
Any donations that were made electronically can be imported into the software from a data file provided to you by the service/company who processes your electronic donations so that you do not have to Enter Donations manually. Determine the type of electronic donation service you are using, and select it from the Import Donations button found under the Donations menu.
The options are as follows:
- Vanco
- Authorize.NET
- Ardent
- Clover Donations
- EFT Plus
- EGiving
- Text File
To access the Import screen:
- From The Initial Portal of Church Windows choose Donations.
- Click Import from the Donations menu in the Button Bar.
- From the dropdown menu, choose either your service/company or choose Text File:
-
Vanco
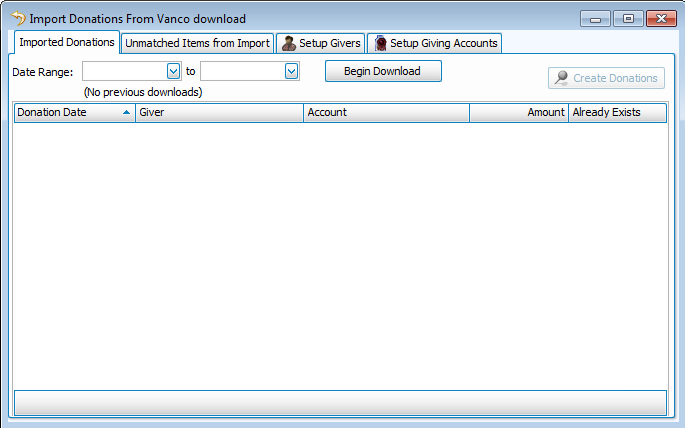
For Vanco imports, you now have two import options:
 Import via download
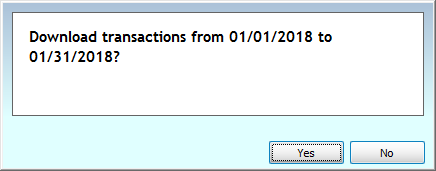
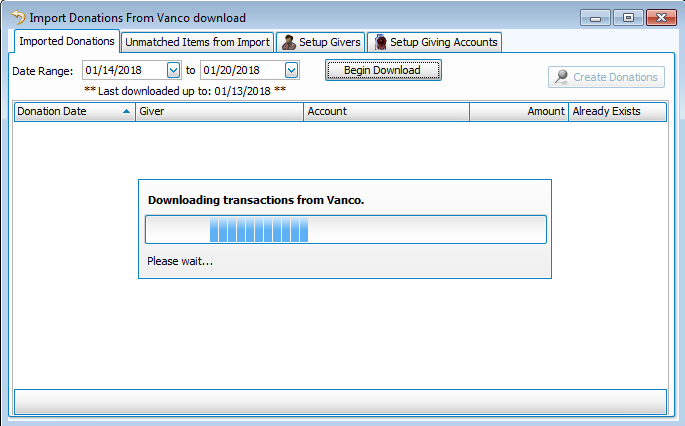
- Login to Vanco directly to import donations, first choose a date range and then click Begin Download:
- A confirmation window will open, choose Yes if it is correct or No to change the dates selected:
- Then, you will login using the account credentials Vanco will provide for Church Windows:
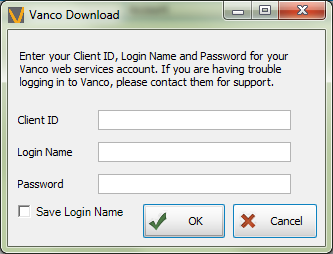
Note:
Any Church who uses Vanco and would like to use the Download option to import the giving directly into Church Windows needs to have a new Web Services Login created for them by Vanco first.Click here to initiate this process with Vanco.
Type “Church Windows” in the “Software/Web Processor Name” box. The credentials will then be emailed to the designated Church contact. - Your download will then begin:
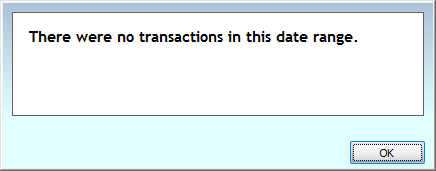
- A pop-up message will alert you if there are no donations available:
- Continue on to Step 4 below.
- Import via file - Follows the same import procedure as the other companies and text file imports, as explained below.
- Learn About Vanco - This link is for those who do not yet use the Vanco service and are curious about it.
- Login to Vanco directly to import donations, first choose a date range and then click Begin Download:
-
Authorize.NET, Ardent, Clover Donations, EFT Plus, or EGiving
- When the Import screen appears, click the Select Import File button.
- Use the window that appears next to navigate to the location where your import file is stored on your computer.
- Click the file to select it, and click Open to proceed.
- Regardless of which type of import you chose above, the Imported Donations tab will then populate the list with the contents of the import file:
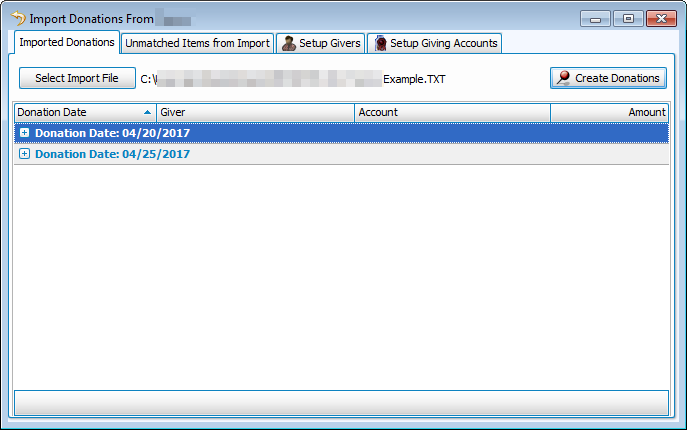
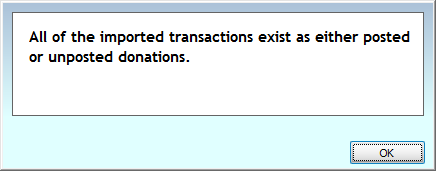
Each entry will have a Donation Date, a Giver, an Account, and an Amount. - Click the Create Donations button in the top right and the Imported Batches screen will show you the batch dates detected in the import file. The system will not duplicate identical transaction; if all of the transactions have previously been imported the following message will appear:
- Click to select each batch you have imported and click the Post Batch button to finalize a posting of the imported batch(es) of donations:
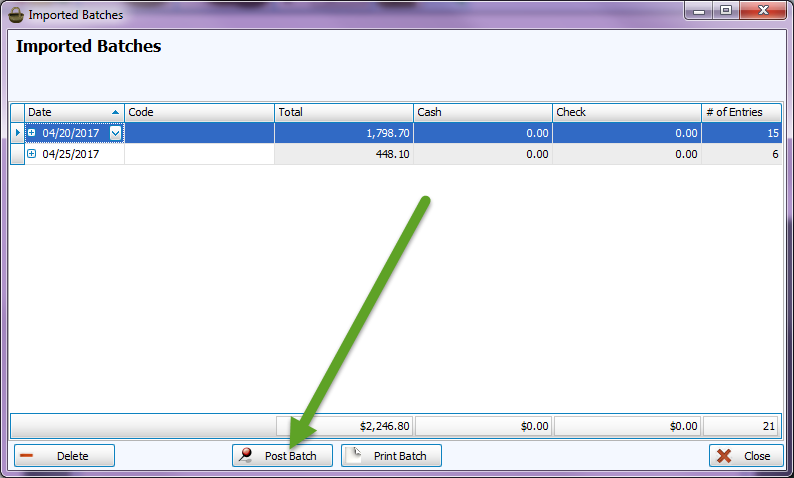
- Then you can Transfer Donations to Accounting just like any other manually entered batch of donations.
- If you close the Imported Batches screen without posting, your batches will be saved in the Unposted Batches screen which can be accessed through the Enter Donations screen.
- You can also click the Print Batch button before posting, or click the button to Delete the batch, according to what is needed.
- Close the window when finished.

Note:
If the file is still attached to your email, you must first download it and store it to a location on the hard drive, or on some kind of media connected to the computer where you are accessing the Import Donations feature.
Note:
The Giver and Account names will only populate if the items have already been linked beforehand on the Setup Givers tab and the Setup Giving Accounts tab. Otherwise, you will first be prompted to link them on the Unmatched Items from Import tab.
Unmatched Items from Import tab
If the import file contains items that are not linked to Givers or Giving Accounts currently stored in Donations, the Unmatched Items from Import tab will immediately reveal them each in its own list:
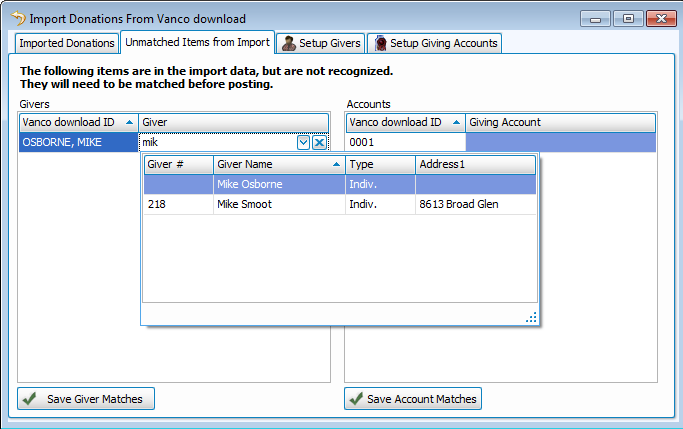
- In the Givers list, click each empty box located next to the ID.
- Choose the corresponding Giver from the dropdown box that appears.
- Then, click the Save Giver Matches button.
- Link together any unmatched IDs by clicking the empty box found next to it in the Accounts list.
- Then, click Save Account Matches.
Note:
The Authorize.NET file import feature will only provide you with a Save Giver Matches button. However, you must still select the Account from the dropdown box to the right of the Givers list.
Setup Givers tab
If you have Givers that opt to use electronic transfer for the donations they make, you can use the Setup Givers tab at any given time to link the unmatched information with the Giver name in Donations:
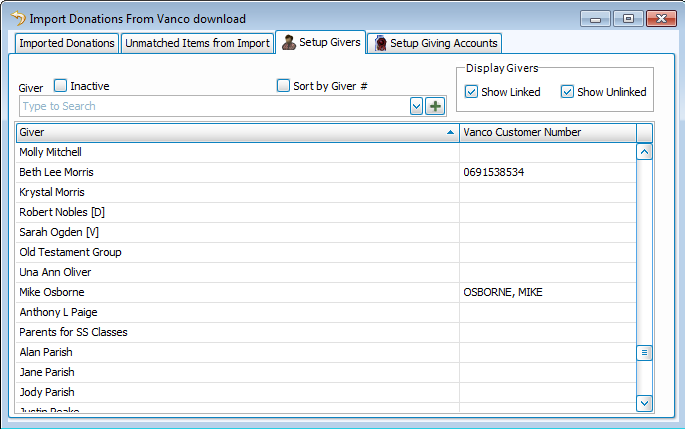
- Choose the Giver from either the dropdown box, or the list below it.
- Then, click the empty box beside the Giver name and choose the corresponding name.
- To have the list display Givers that are linked and/or unlinked, click to place a checkmark beside the Show Linked and/or Show Unlinked box.
Setup Giving Accounts tab
With the exception of Authorize.NET files, use the Setup Givers tab at any given time to link the unmatched information with Giving Accounts in Donations:
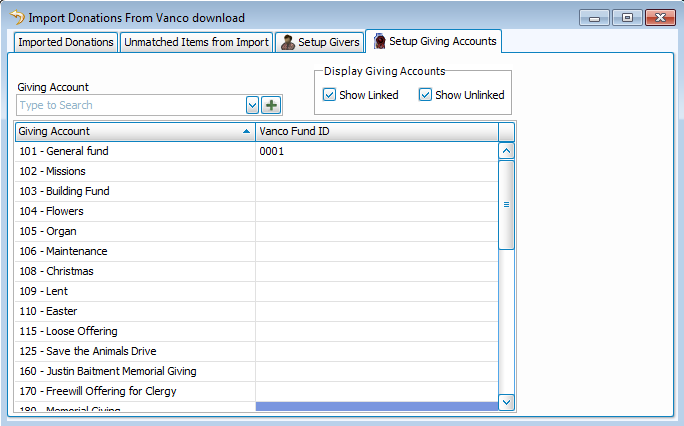
- Choose the Giving Account from either the dropdown box, or the list below it.
- Then, click the empty box beside the Giving Account and choose the corresponding name.
- To have the list display giving accounts that are linked and/or unlinked, click to place a checkmark beside the Show Linked and/or Show Unlinked box.
