Pictures
Church Windows allows you to add a photograph to
The Individual Record and
The Family Record. Pictures are only necessary if you intend to use
Church Windows to print a pictorial
Directory / Custom Reports with photos. Pictures may be added from any source such as a CD, digital camera or a scanner, or a video board with a video camera attached, etc. When you have a professional company take pictures of your members and create a pictorial directory for you, sometimes the company can give you the digitized photos on a CD or USB drive. Supported file types are the following formats: BMP, JPG, JPEG, GIF, PNG, or WMF.
Adding, Changing, or Removing pictures in
Church Windows is quite easy. The
Membership
Module will allow you to move through your records in
The People File and preview the pictures you already added and to connect new pictures to individual or family records. This routine saves the photos in the
CW\Pictures directory with the correct file names for you.
If you will have one photo for each family, we recommend that you save that photo to
The Family Record instead of one of the individuals. In the past, you were only able to store individual photos and the one assigned to the
1 — Primary person was used in pictorial Directories.
If you have assigned the family photo to the 1 — Primary person, as in previous versions of Church Windows, use the Indiv / Family Pictures tab in Settings to move that photo to The Family Record.
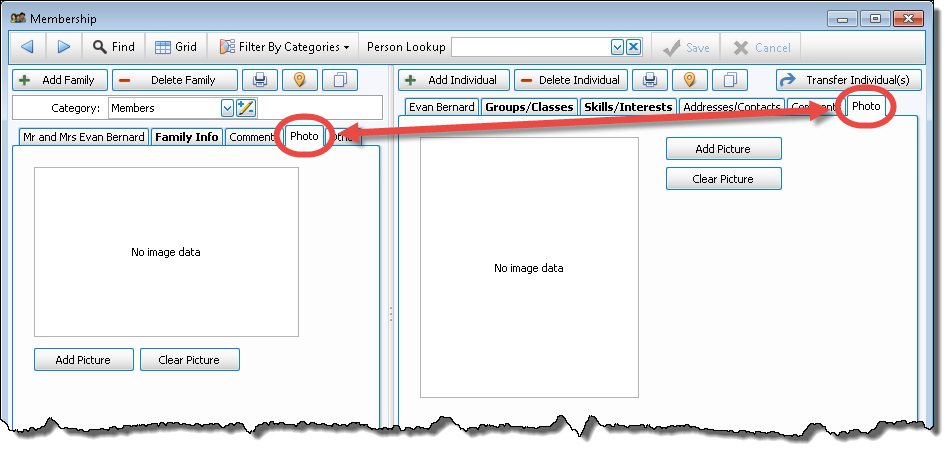
To access the Pictures assignment screen:
- From The Initial Portal of Church Windows choose Membership.
- Open The People File.
- If the appropriate family/individual record is not open, bring it to the screen using Person Lookup, the Prior and Next buttons, or Using the Find Function.
- Click the Photo tab, which appears above
The Family Record or
The Individual Record
 Adding Pictures
- To find this person or family’s photo, click the Add Picture button. This will bring up a file screen similar to Windows Explorer.
- In that file explorer screen, in the left column, navigate to the drive and directory where your digital pictures are currently stored. The right column will display a list of all pictures stored in that directory. Select a file by clicking the file name.
- Once you locate the correct image to associate with this record, then click the Open button. This copies that image to your CW\Pictures folder and gives it the appropriate file name.
- You may then either click Next or Find to move to the next individual record to associate another picture.
You can now print a pictorial directory using one of the default templates or by creating your own using the Report Designer.
Changing Assigned PicturesOnce a picture is associated with an Individual or Family in Church Windows, you may change the picture to another picture, if necessary. ( Church Windows is not capable of editing the picture image itself. Use an image-editing program to make changes to the pictures.)
- Locate the original or new source for your pictures — this could be the CD or disk then pictures are on or a file on your hard drive.
- Click the Add Picture button
- The system will warn you that this will overwrite the current picture in the
CW\pictures folder:

- Click YES to continue, or click NO to cancel the deletion.
- Navigate to the drive or directory where the correct picture for this individual is stored, then click the Open button.
- This copies that image to your CW\Pictures folder and gives it the appropriate file name to link it to that individual.
- That new picture will now display.
Removing PicturesOnce a picture is associated with a Family or Individual in Church Windows, you may remove that picture using the function within Church Windows:
- If you’d like to remove the picture completely, simply click the Clear Picture button.
- The picture will no be gone. This cannot be undone.
