Statement Designer
The Statement Designer is a design tool with customizable sections for donations statements. Use statements to show detailed end of year giving, pledge campaign progress throughout the year, and fulfill charitable giving requirements. The [Template] layouts included with the software can be copied and used as a starting point for a customized layout.
Access
To access from the Button Bar, go to Reports/Export > Donation Statements > Statement Designer

To access from the Home Screen, go to the Quick Access Button
Using the Statement Designer
-
The white grid portions of the screen represent the workable area where you can place content. Light gray portions are often portions sectioned off for the next column which will repeat the layout. Fields backed with a light purple color are inside of a field connector. Fields that have a yellow barrel indicate fields that will pull information from the database. Fields that show up in pink indicate that they are overlapping with another field.
-
Fields can be dragged and dropped with your mouse or, once selected, you can use the arrow keys to move fields. For more minute control, hold the CTRL key while using the arrows on your keyboard to move objects. Holding SHIFT and CTRL will stretch or shrink objects.
-
To move through each field, you can click on one and hit the TAB key to move to select the next field.
-
Clicking and dragging within the grid area will create a box that will select all of the fields it overlaps, allowing you to select multiple fields at once. If the fields are all text fields (make sure that the light purple label connectors are not selected) you can make formatting adjustments like font or size to multiple fields at once. You can also select multiple fields by holding the CTRL key as you're selected or deselecting fields.
-
The
 symbol in the grid typically indicates that you're attempting to insert an object into an invalid section.
Controls and Tool Bars

Save As
Clicking the  button will prompt you to give the report a new name. If you are editing an existing layout or a [Template] layout, this will save a copy with a new title rather than overwrite the existing file.
Save
Clicking the  button will save the changes and update the report you selected to edit.
CTRL + A
Cut
The  button will remove the selected object and store it in your clipboard to be pasted elsewhere.
CTRL + X
Copy
The  button will make a copy of the selected object to your clipboard while leaving the original in place.
CTRL + C
Paste
The  button will place the object currently in your clipboard from Cut or Copy.
CTRL + V
Undo and Redo
These  buttons are the undo and redo buttons. The arrow going to the left will undo your last action. The arrow going to the right will redo an action that was previously undone.
Undo - CTRL + Z
Redo - CTRL + Y

Font Name
 The font dropdown window lists the available fonts.
Font Size
 The font size drop down allows you to control the size of the font.
Font Decoration
 These buttons will apply bold, italic or underline effects to text.
Bold - CTRL + B
Italic - CTRL + I
Underline - CTRL + U
Text Alignment
 The text alignment will determine whether text within a field will align to the left, centered or to the right.
Foreground Color
 Foreground color will change the color of text, borders, or lines.
Select a color from the defaults or click the tabs or More Colors... for more customizable options.


Background Color
 Background color will change fill color of the selected field.


These tools allow you to zoom in or out within the Statement Designer. These settings will not affect the printed output, only the display within the Statement Designer. You can either use the zoom in and out buttons or dropdown in the Main Toolbar at the top of the screen or use the buttons or slider at the bottom of the screen. Zooming in can help you distinguish and select fields that are small or condensed.
Zoom Out - CTRL + Minus
Zoom In - CTRL + Plus

Align to Grid
 Align the positions of the selected objects to the grid.
Align Fields
 Align the selected objects.
Size Fields

Make selected controls the same height and/or width or size the selected object to the nearest grid lines.
Space Fields

Equalize, increase, decrease, or remove spacing horizontally or vertically between objects.
Center in Section

Horizontally or vertically center objects within a report section.
Send to Front or Back

Send objects to the front or back.

Account Summary
Click the check box to include or exclude the Account Summary section.
Click Edit Account Summary to format the appearance and choose columns.


Detail Section
Click the check box to include or exclude the Account Summary section.
Click Edit Detail Section for options, to format the appearance and choose columns.


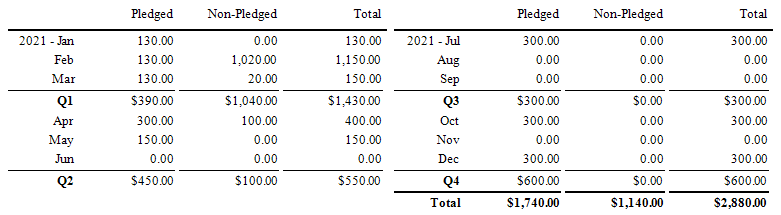
Quarterly Section
Click the check box to include or exclude the Account Summary section.
Click Edit Quarterly Section for options, to format the appearance and choose columns.


Selecting the pointer will return your cursor to the original state in order to select objects.

The Label control allows you to insert a label or text field. Double click inside a label to edit the text, or click the  icon to open Label Tasks.

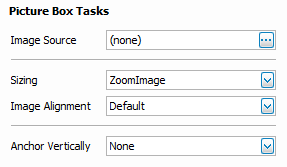
The image tool places a frame in your report that allows you to add an image file from your computer. Valid image file types include BMP, JPEG, GIF, EMF, WMF, TIFF, PNG, ICO, and SVG. To select an image, click the icon of the image frame and click the  next to Image Source to browse to the image file.

Horizontal line inserts a line that can be set to a length you determine onto the page.

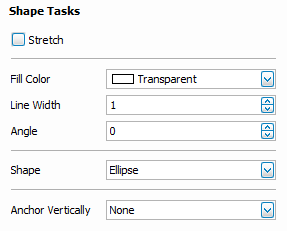
The shape tool allows you to add a simple geometric shape to your report design. Click and drag the shape object onto your report and click the icon to open Shape Tasks where you can choose the shape, settings, and fill color.

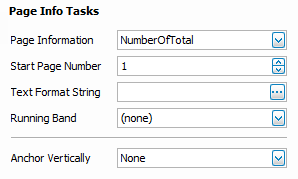
Page Information allows you to insert a variable that provides automatically generated information such as page numbers, date and time stamps. Click the to open Page Info Tasks.

The Border tool allows you to place a rectangular container around objects in your report. This differs from a transparent rectangle from the shape tool in that it can cross through multiple report sections and will now give the pink overlapping alert provided that the border itself and the objects within it are not overlapping.

Giver Name
Name of individual or giving unit
Global Memo
Message set on Step 2 > Options > Global Memo
Quarterly Date Range
Date range for the Quarterly section determined on Step 2 > Options > Statement Date Ranges
Required Tax Agency Statement
Message consistent with IRS requirements for charitable contribution statements.
Statement Print Date
Date that the statement was produced.
Account Summary Date Range
Date range for the Summary section determined on Step 2 > Options > Statement Date Ranges
Detail Date Range
Date range for the Detail section determined on Step 2 > Options > Statement Date Ranges
Statement Date Range
Date range for Statement determined on Step 2 > Giving/Pledging Date Range
Total Given
Grand total of all donations recorded for this giver or giving unit
Total Tax Status Unknown
Total for donations with an undetermined tax deductibility status
Total Tax Deductible
Total for donations to tax deductible giving accounts
Total NonTax Deductible
Total for donations to non-tax deductible giving accounts
Giver Name and Address
Name of the individual or giving unit and mailing address
Giver Address Only
The mailing address of the individual or giving unit
Giver #
Giver or Envelope # as determined by the Giving/Pledging end date set in Step 1
Mailing Label, Name
For individual givers, their mailing label followed by their first and last name. For giving units, this returns only the mailing label.
Statement Memo
The personalized statement message as entered on Step 2
Organization Info Field
Field options from Organization Info as set in Step 2 > Organization Info