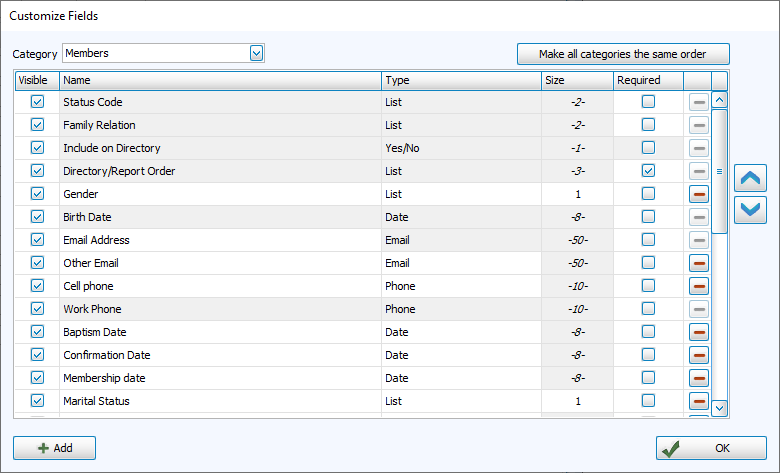
Customize Fields
With Customize Fields you can manage the fields in your Membership records.
Common uses of the Customize Fields screen include:
-
Adding new custom fields for one or more categories
-
Hiding or deleting fields that are no longer in use
-
Arranging record display and sort order
Access Customize Fields
To access from the Button Bar, go to Special Functions > Customize Fields.

To access from a record in People, click  .
.
Add New Fields
Fields can be specific to a given family category. The category you're currently added to is listed in the upper left, but can be changed in the dropdown. To add a field to more than one category, select another category and check your new field as 'Visible.'
-
Click

-
Enter the name of the new field.
-
Select a Field Type.
-
For some fields that hold text, indicate a character length of up to 50.
-
Click
 .
.
Edit Existing Fields
-
Highlight the name of the field to edit.
-
Type your changes in the name or size columns.
-
Click OK.
Reorder Fields
Reorder from Individual Records
-
Right click in the individual fields area.
-
Click

-
Drag and drop fields to their new positions.
-
Click

Reorder from Customize Fields
-
Highlight the name of the field to move.
-
Click the
 or
or  arrows to change the sort order.
 -
Click
Hide Fields
-
Highlight the name of the field to hide.
-
Uncheck the box in the Visible column. This moves the field to the bottom of the list and darkens the background.
Note: In order to create a directory, the Include on Directory field must be visible for all categories.
Delete Fields
-
Highlight the name of the field you want to delete.
-
Click
 .
. -
Confirm to delete the field and data.
Field Types
Records hold a wide variety of information. Choosing the best field type and understanding their features make for a more accurate and easy-to-use database.
List

Use the List field type if you want to "tag" people, or create lists. These fields allow you to create standardized drop-down options, also known as codes. These codes can be managed with  .
.
Examples: Status, Grade, Mailing Code
Yes/No

The Yes/No field type presents as a check box. This field is good for true/false data.
Examples: Include on Directory, Inactive, Show in Scheduler
Character

Character fields are flexible text entries. They accept up to 50 alphanumeric characters, with a character max set in Customize Fields. This field type is good for data with a lot of variation.
Examples: Profession, Referred By, Allergies
Numeric

Numeric fields accommodate up to 50 numbers, with a character max set in Customize Fields.
Example: ID Number, Pass Code
Date

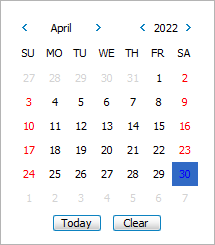
The Date field offers a calendar picker and date entry in a MM/DD/YYYY format. If part of a date is unknown, the digit can be replaced with a '?'. Listing even a partial date still allows the entry to included in date reports.
Examples: Birth Date, Membership Date, Marriage Date
Phone

These fields standardize phone numbers with a three digit area code and seven digit phone number, with optional four digit extension in (###) ###-#### format.
The Unlisted check box, will exclude this number from directories. These numbers can still be included on other reports, optionally designated as unlisted with an asterisk*.
Phone fields can be indicated as a Primary number.
Examples: Cell Phone, Work Phone, Emergency Contact

Email fields accommodate up to 50 characters. These fields are added to the Send Email and Send Donation Statement functions.
The Unlisted check box will exclude this email from directories.. They can still be included on other reports, optionally designated as unlisted with an asterisk(*).
Examples: Personal Email, Work Email